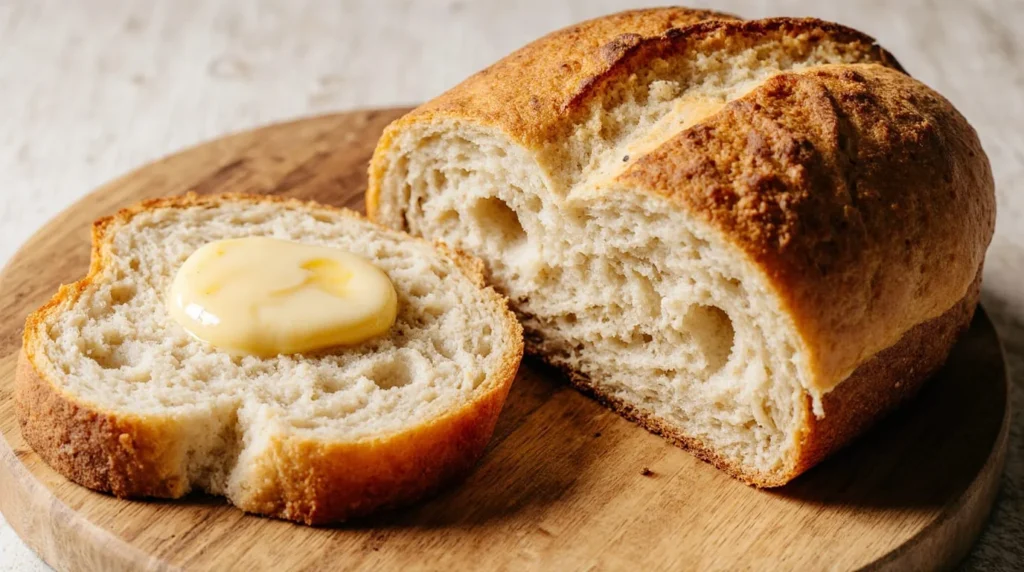
I’ll never forget the first loaf of bread I baked at home. It wasn’t a picture-perfect Instagram loaf. It was lopsided, a little too dark on top, and denser than I’d hoped. But when I pulled it from the oven and that wave of warm, yeasty fragrance hit me—a smell so profoundly comforting it felt like a hug—I was hooked. That first imperfect slice, slathered with melting butter, tasted better than any store-bought loaf. It tasted like accomplishment.
Maybe you’ve felt the same intimidation I did. Yeast seems like a finicky science, kneading sounds like a workout, and the fear of a doorstop-loaf is real. But after years of baking—and teaching countless beginners—I’ve learned a beautiful secret: great home bread recipes aren’t about perfection. They’re about understanding a few simple principles.
Today, I’m sharing three foundational home bread recipes that will build your confidence and fill your home with that unbeatable aroma. Whether you dream of a crackling-crust artisan loaf, a soft sandwich bread for perfect toast, or simple, buttery rolls, we’re going to make it happen. No fancy equipment required.
Table of Contents
Why Baking Your Own Bread is a Game-Changer
Before we get our hands floury, let’s talk about the “why.” Beyond the incredible flavor, a 2020 study published in the International Journal of Gastronomy and Food Science highlighted the therapeutic benefits of baking, linking it to reduced stress and increased feelings of well-being. Baking bread is mindfulness you can eat.
The real benefits of homemade bread:
- Control: You know exactly what’s in it—no mysterious preservatives or additives.
- Flavor: Freshly baked bread has a depth and complexity that packaged bread loses.
- Satisfaction: The primal satisfaction of creating a staple food is unmatched.
- Cost-Effective: A basic loaf costs pennies compared to artisanal bakery prices.
- Versatility: Once you master a basic dough, the flavor variations are endless.
Bread Baking 101: Demystifying the Process for Beginners
Let’s break down the core components of any great home bread recipe. Understanding the “why” behind each step will make you a more confident baker.
The 4 Essential Ingredients (and Their Jobs):
- Flour: The structure. The protein in flour (gluten) forms the network that traps gas and gives bread its chew. For beginners, all-purpose flour is perfect. For chewier loaves, try bread flour.
- Water: The activator. It hydrates the flour, dissolves the yeast and salt, and creates steam for a good rise and crust.
- Yeast: The engine. These tiny living organisms feast on sugars, producing carbon dioxide gas that makes the dough rise. I recommend active dry yeast for its reliability and long shelf life.
- Salt: The regulator. It controls yeast activity, strengthens gluten, and, most importantly, makes the flavor pop. Never skip it.
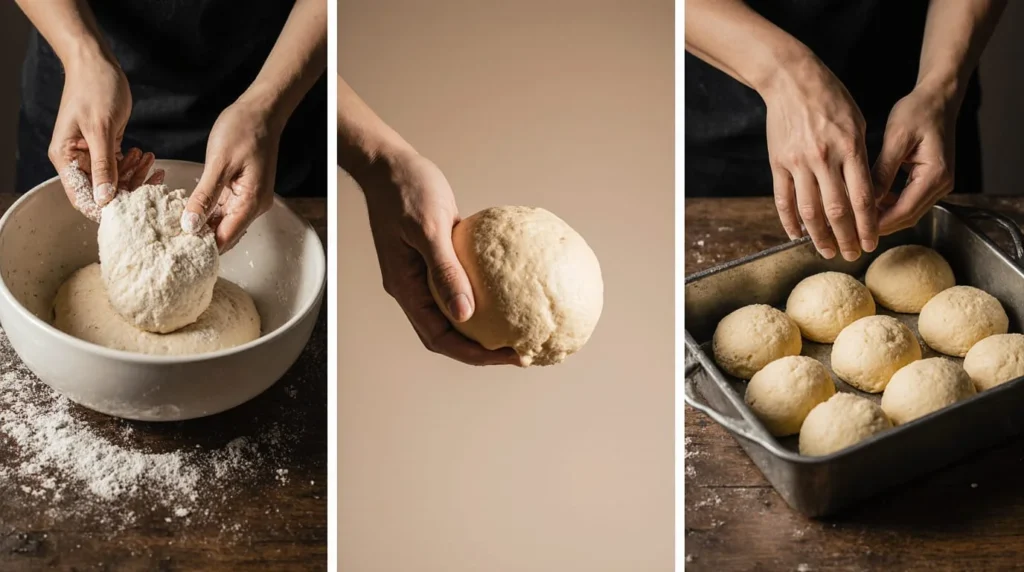
The 5 Key Stages of Bread Making:
- Mixing: Combining ingredients to form a shaggy dough.
- Kneading/Resting: Developing the gluten network, either by hand/folding (for no-knead) or machine.
- First Rise (Bulk Fermentation): Where flavor develops as the yeast works.
- Shaping: Creating surface tension for a good final shape.
- Second Rise & Baking: The final puff and the oven’s transformative heat.
Now, let’s put this knowledge into practice.
Recipe 1: The No-Knead Artisan Loaf (Your First Triumph)
The “Magic” Bread
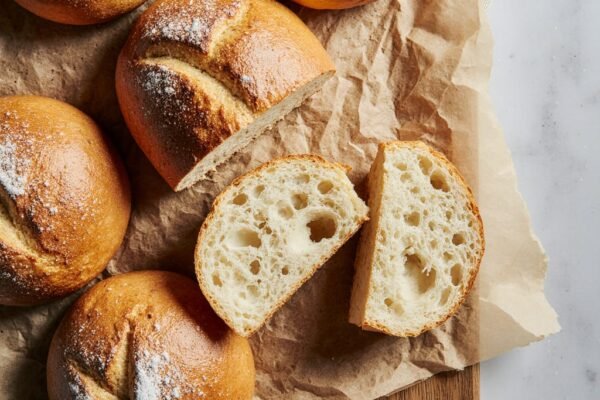
This home bread recipe is legendary for a reason. Popularized by Jim Lahey, it uses time instead of muscle to develop gluten, resulting in a loaf with an open crumb, chewy texture, and a professional-looking crust. It’s almost impossible to mess up.
Ingredients:
- 3 cups (360g) all-purpose or bread flour
- 1 ½ cups (360ml) warm water (about 100°F/38°C)
- 1 ¼ teaspoons kosher salt
- ¼ teaspoon active dry yeast
Step-by-Step Guide:
Day 1 (Evening): The 5-Minute Mix
- In a large bowl, whisk together flour, salt, and yeast.
- Add the warm water and stir with a wooden spoon until a shaggy, sticky dough forms. It will look messy—this is correct!
- Cover the bowl tightly with plastic wrap and let it sit at room temperature for 12-18 hours. Overnight is perfect.
Day 2 (Baking Day): Shape, Rest, and Bake
- The Turn: The dough will be bubbly. Generously flour a work surface and your hands. Scrape the dough out. Using a dough scraper or floured hands, fold the dough over itself 4-5 times—north, south, east, west—to form a rough ball.
- The Rest: Place the dough seam-side down on a heavily floured tea towel. Cover with another towel and let it rest for 1-2 hours, until roughly doubled.
- Preheat: While the dough rests, place a Dutch oven (with its lid on) in your oven and preheat to 450°F (230°C) for 45 minutes.
- The Bake: Carefully remove the scorching-hot Dutch oven. Gently turn the dough into the pot, seam-side up (it’s okay if it’s messy). Cover with the lid and bake for 30 minutes. Remove the lid and bake for another 15-20 minutes until deeply golden brown.
- The Cool: Transfer to a wire rack and let it cool completely before slicing (the hardest part!).
Baker’s Secret: The steam trapped in the Dutch oven creates the bakery-style crackly crust. For extra flavor, replace ½ cup of the all-purpose flour with whole wheat or rye.
Recipe 2: Soft & Fluffy Sandwich Bread
The Daily Driver
This is the quintessential home bread recipe for toast, sandwiches, and just plain eating. It’s enriched with a bit of butter and honey for a tender crumb and golden crust.
Ingredients:
- 2 ¾ cups (330g) bread flour (all-purpose works too)
- 1 cup (240ml) warm whole milk (about 110°F/43°C)
- 2 tablespoons honey or sugar
- 2 tablespoons unsalted butter, melted + extra for greasing
- 1 large egg
- 2 ¼ teaspoons (one ¼ oz packet) active dry yeast
- 1 teaspoon salt
Step-by-Step Guide:
- Proof the Yeast: In the bowl of a stand mixer or a large bowl, whisk the warm milk, honey, and yeast. Let it sit for 5-10 minutes until foamy.
- Make the Dough: Add the egg, melted butter, and 2 cups of flour. Mix with a dough hook or spoon until combined. Add the salt and remaining flour, ¼ cup at a time, until a soft dough forms that pulls away from the bowl’s sides. Knead by machine for 5-7 minutes, or by hand on a floured surface for 8-10 minutes, until smooth and elastic.
- First Rise: Place the dough in a buttered bowl, turn to coat, and cover. Let rise in a warm place for 1-1.5 hours, until doubled.
- Shape: Grease a 9×5 inch loaf pan. Punch down the dough and turn it out onto a floured surface. Roll into a rectangle about 9 inches wide. Roll it up tightly (like a cinnamon roll), pinch the seam, and place seam-side down in the pan.
- Second Rise: Cover and let rise until the dough crowns about 1 inch above the pan rim, about 45-60 minutes.
- Bake: Preheat oven to 350°F (175°C). Bake for 30-35 minutes until the top is golden brown and the loaf sounds hollow when tapped. Immediately brush the top with a little melted butter for a soft crust. Cool in the pan for 10 minutes, then transfer to a rack.
Pro Tip: For perfect slices, let this bread cool completely. Use a serrated bread knife and a gentle sawing motion.
Recipe 3: Simple & Soft Dinner Rolls
The Crowd-Pleaser
Mastering a basic roll dough opens doors to burger buns, cinnamon rolls, and more. This home bread recipe is your versatile foundation.
Ingredients:
- 3 cups (360g) all-purpose flour
- 1 cup (240ml) warm water
- ¼ cup (60ml) warm milk
- 2 tablespoons sugar
- 3 tablespoons soft butter
- 1 large egg
- 2 ¼ teaspoons active dry yeast
- 1 teaspoon salt
Step-by-Step Guide:
- Make the Dough: Follow the same initial steps as the sandwich bread: proof yeast in warm water/milk with sugar. Add egg, soft butter, and half the flour. Mix, add salt, then remaining flour. Knead until smooth.
- First Rise: Let rise in a covered, buttered bowl until doubled, about 1 hour.
- Shape the Rolls: Divide the dough into 12 equal pieces. To shape: flatten a piece slightly, then pull the edges down and pinch together underneath to create a smooth top. Place in a buttered 9×13 inch baking dish.
- Second Rise: Cover and let rise until puffy and touching, about 30-45 minutes.
- Bake: Preheat oven to 375°F (190°C). Bake for 18-22 minutes until golden brown. Brush with melted butter right out of the oven.
Troubleshooting Your Home Bread Recipes
Even pros have off days. Here’s a quick guide:
- Dense, heavy loaf: Under-proofed (didn’t rise enough), or yeast was old/killed by too-hot liquid.
- Bread collapses: Over-proofed (rose too long, gluten network weakened).
- Pale, soft crust: Oven wasn’t hot enough, or lacked steam (for crusty loaves).
- Tough crust: Bread cooled in the pan, trapping steam.
- Large, uneven holes: Under-kneaded or needed more folds during the first rise.
Your Bread-Baking Toolkit
You don’t need much! Start with:
- A good digital scale (for accuracy)
- A Dutch oven (for artisan bread) or loaf pan
- A bench scraper (incredibly handy)
- A thermometer (to check water/milk temp)
The King Arthur Baking Company’s Baker’s Hotline is an incredible, free resource for troubleshooting and inspiration.
Pairing & Enjoying Your Homemade Bread
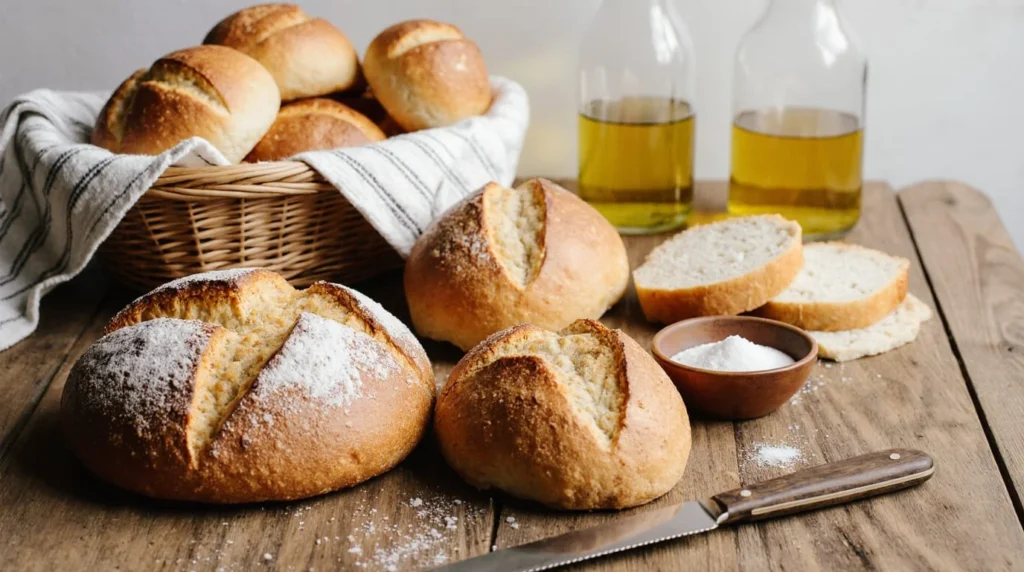
Your fresh bread deserves the best companions! Tear your artisan loaf and dip it in your best extra virgin olive oil with a pinch of salt. Use your sandwich bread for the ultimate grilled cheese. Slather warm dinner rolls with homemade honey butter.
Frequently Asked Questions (FAQs)
1. Can I use all-purpose flour instead of bread flour?
Yes! Bread flour has more protein, leading to a chewier crumb. All-purpose flour will give you a slightly more tender loaf, which is perfect for sandwich bread and rolls.
2. How do I know if my yeast is still active?
Proof it! Dissolve it in warm water (105-110°F) with a pinch of sugar. If it’s foamy and bubbly after 5-10 minutes, it’s alive and ready.
3. My kitchen is cold. How can I help my dough rise?
Create a warm spot. Place your covered bowl in an oven with just the light on, on top of a preheating dryer, or near a radiator. The ideal dough temperature is around 75-78°F (24-26°C).
4. Can I freeze homemade bread?
Absolutely! Let it cool completely, wrap tightly in plastic, then foil, and freeze for up to 3 months. Thaw at room temperature or refresh slices in the toaster.
5. Why does my bread taste bland?
You likely need more salt. Salt is crucial for flavor. Also, longer, slower rises (like in the no-knead recipe) develop more complex flavors.
6. What’s the difference between active dry yeast and instant yeast?
Instant yeast can be mixed directly into dry ingredients. Active dry yeast should be dissolved in liquid first (proofed). They can often be used interchangeably, but proofing active dry ensures it’s working.
7. How can I make whole wheat bread?
Start by substituting 1/3 to 1/2 of the white flour in any recipe with whole wheat. It absorbs more liquid, so you may need to add a few extra tablespoons of water or milk.
Conclusion: Your Journey to Becoming a Home Baker Starts Here
Look at that. You’re no longer just someone who buys bread—you’re someone who understands it. You know how to choose a home bread recipe for the occasion, how to read the dough’s cues, and how to turn simple ingredients into something extraordinary.
Start with the no-knead loaf. It’s the most forgiving and will give you that life-changing confidence boost. Then, try the sandwich bread for your everyday needs. Soon, you’ll be experimenting with add-ins like herbs, cheeses, dried fruits, and nuts.
The best part? Every time you bake, your home will be filled with that smell—the smell of warmth, care, and delicious accomplishment. It’s a smell that says, “I made this.”
I’d love to follow your baking journey! Which recipe did you try first? Did you add your own twist? Share a photo of your first loaf or your proudest bake in the comments below. Let’s build a community of home bakers, one perfect (or perfectly imperfect) loaf at a time.