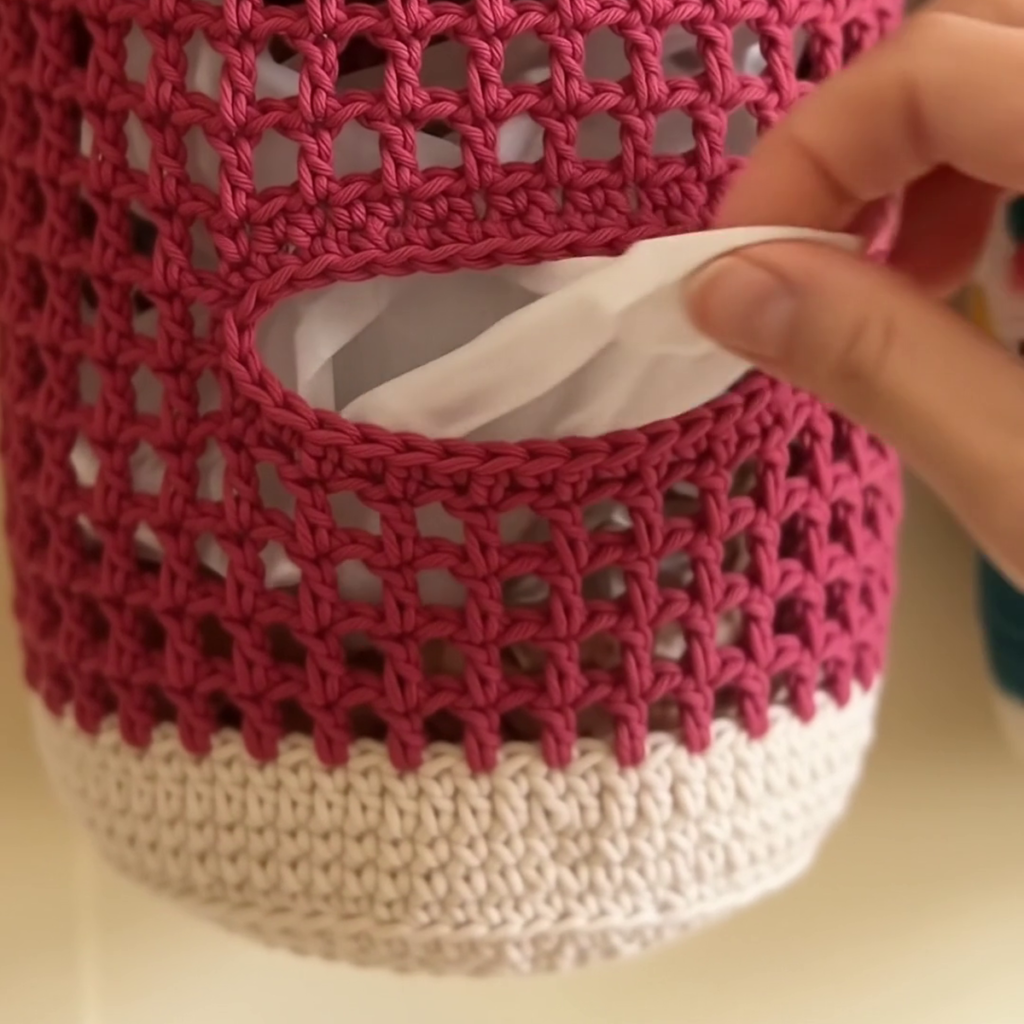
Plastic bags pile up in kitchen cabinets. This crochet dispenser hangs on a door hook: push bags in at the open top and pull them out one by one through a horizontal slot near the bottom. A cream cup, a raspberry mesh tube and a cream rim form the body, a wooden ring carries it and three small flowers decorate one side.
It measures about 42.5 cm (16.7 in) long and 12.7 cm (5 in) wide. The pattern follows the five stages of the video. The counts come from the gauge below and were checked round by round, and the photos are frames from the video.
Stages and sizes
| Stage | Part of the holder | Size to check |
|---|---|---|
| 1. Lower dispensing section | Cream cup with the slot | Cup 5 cm tall, slot 8 × 5 cm |
| 2. Crochet mesh body | Raspberry mesh tube | 33.8 cm deep after row 27 |
| 3. Upper rim and hanging ring | Cream rim and folded collar | 4 rim rounds, collar flat at 10 cm |
| 4. Crochet flowers | Three flowers, four leaves | 10 stitches in the ring, 5 petals |
| 5. Floral assembly | Cluster below the rim | Whole holder 42.5 cm long |
Stitches you will use
- Mesh: a double crochet, chain 1 and a skipped stitch make one open square.
- Magic ring: starts a round with no hole in the middle.
- Whipstitch: a sewing stitch that holds the collar around the ring.
Pattern Info
- Skill Level: Advanced beginner
- Finished Size: about 42.5 cm (16.7 in) long and 12.7 cm (5 in) across, without the wooden ring
- Gauge: 15 sts and 16 rows = 10 cm (4 in), single crochet; mesh 7.5 units and 8 rows = 10 cm
- Abbreviations Used: ch, sl st, sc, hdc, dc, inc, dec
Materials
- Yarn: worsted-weight (Category 4) cotton in cream (about 65 yd, 60 m) and raspberry (about 145 yd, 133 m), with scraps of blush pink, dusty rose and green (about 5 yd, 5 m each)
- Hook: 4.5-5.5 mm (US 7 to I/9), or the size that matches the gauge; two smaller hooks for the flowers
- Notions: a natural wooden ring (8.5 cm outer diameter), a yarn needle and stitch markers
Crochet the dispenser stage by stage
Each stage shows the photo from the video, a diagram, the rounds and a checkpoint.
Step 1: Lower dispensing section
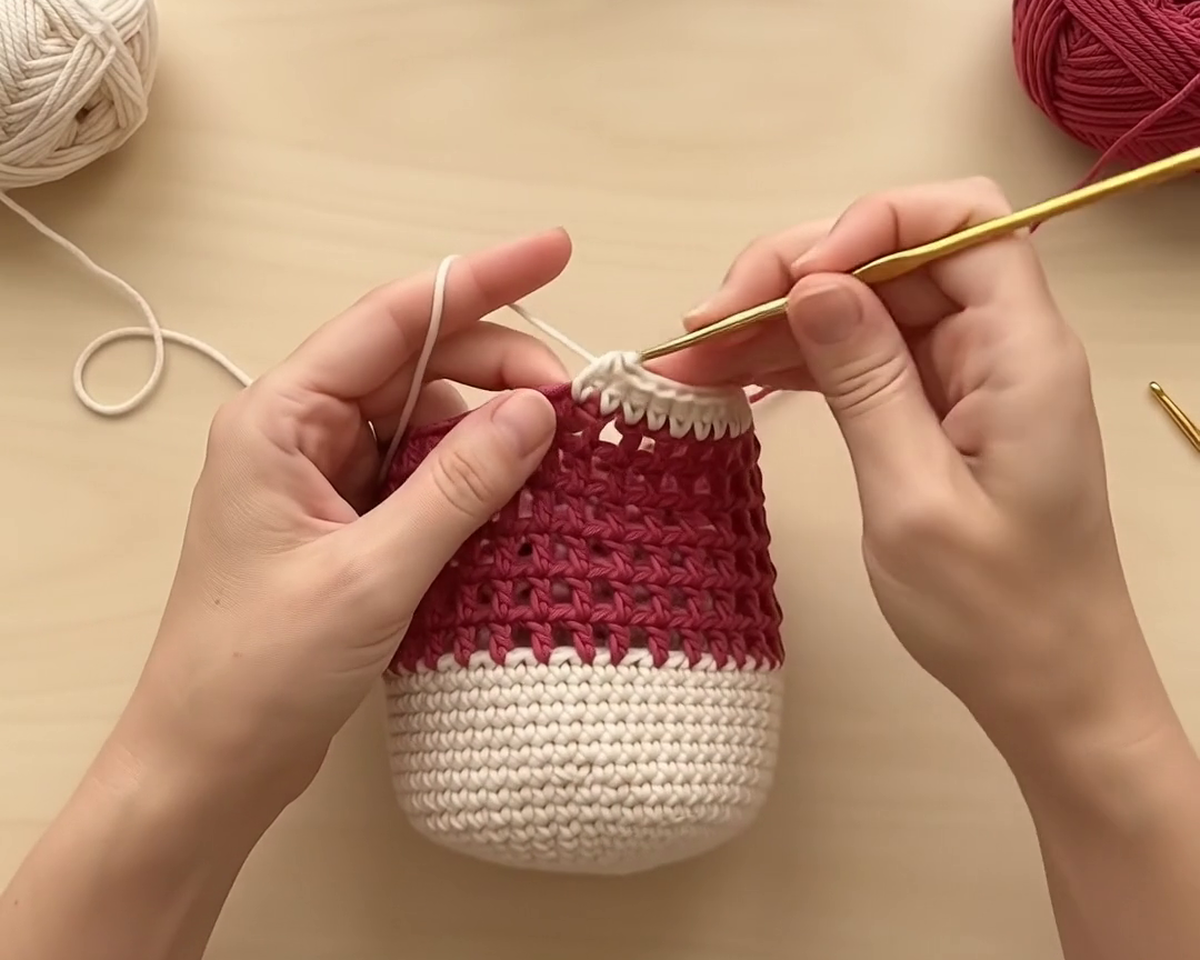
Start with a magic ring and widen the circle until it reaches the cup width in the checkpoint. A back-loop-only round bends the edge upward and the cup grows straight from there. Change to raspberry for the first mesh row. The next few rows are turned at the slot edges instead of joined, which leaves a window in the front. A chain bridge closes its top and rejoins the round, and a single crochet border stiffens it.
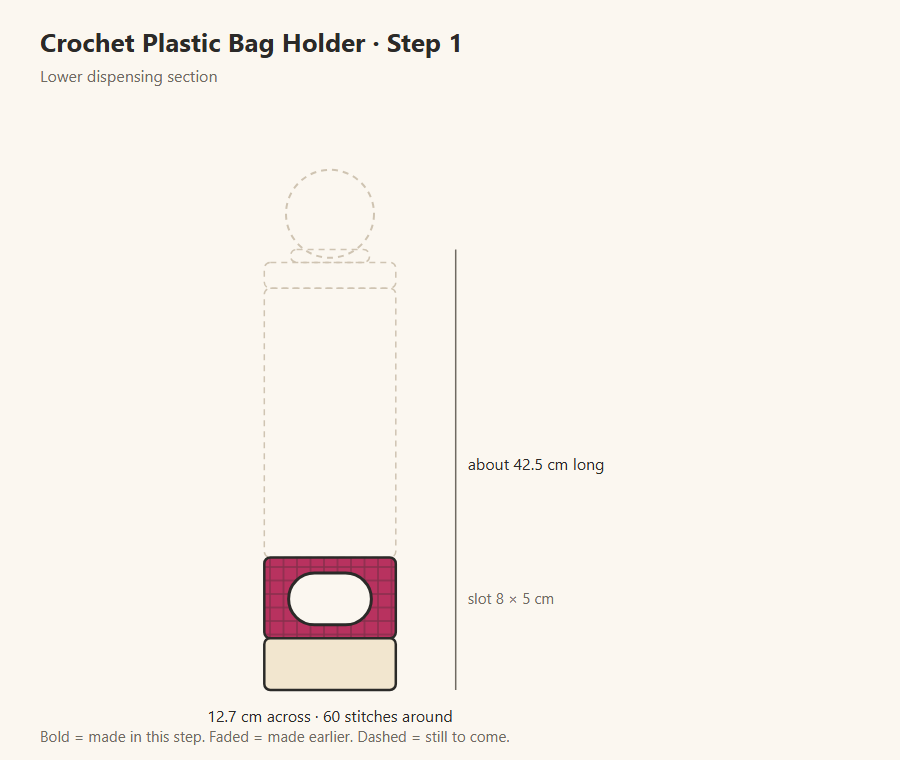
| Round | Instructions | Stitches |
|---|---|---|
| Rnd 1 | 6 sc in a magic ring. | 6 |
| Rnds 2–10 | Rnd 2: inc in each st around. Then each round: (sc in next [round number − 2] st, inc) × 6. | 12, 18, 24, 30, 36, 42, 48, 54, 60 |
| Rnd 11 | Sc in the back loop only of each st around (this turns the corner of the cup). | 60 |
| Rnds 12–18 | Sc in each st around. | 60 |
| Mesh row 1 | Change to the body colour. (dc in next st, ch 1, skip 1 st) × 30. Join with a sl st. | 60 (30 mesh) |
| Mesh rows 2–5 | Work back and forth. Row 2: sl st over the next 12 st (the slot), then 24 mesh, ch 4, turn. Rows 3–5: 24 mesh, ch 4, turn. | 48 (24 mesh) per row |
| Mesh row 6 | Ch 12 across the slot and sl st in the first dc of the previous row. Work 24 mesh along that row, then join with a sl st to the first ch of the bridge. | 60 (24 mesh + 6 over the bridge) |
| Slot border | Join the body colour at one corner of the slot. Sc evenly around the opening: 12 over the bridge, 12 along the bottom edge and about 12 up each side. Fasten off. | 48 sc |
Checkpoint: The cream cup is about 5 cm tall and 12.7 cm across (60 stitches). The slot is 6 mesh wide and 4 rows tall (about 8 × 5 cm), one mesh row above the cup, and the round is back to 60 stitches after the bridge row.
Step 2: Crochet the mesh body
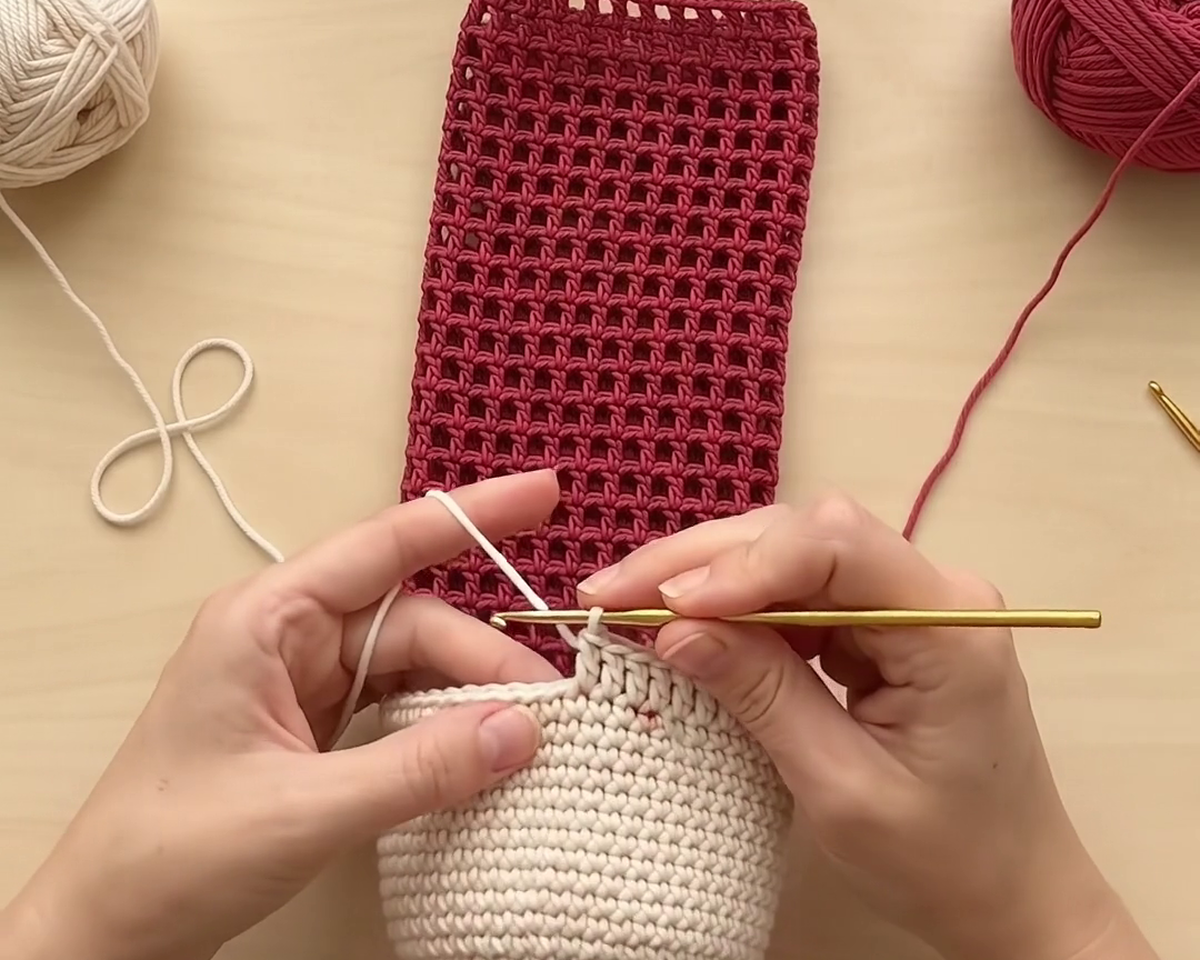
From here every round repeats the same pair, a double crochet and a chain-1 space. Do not pull tight: the mesh must stretch around a stack of bags. Count the mesh against the checkpoint now and then, and check that the slot stays centred as the tube grows.
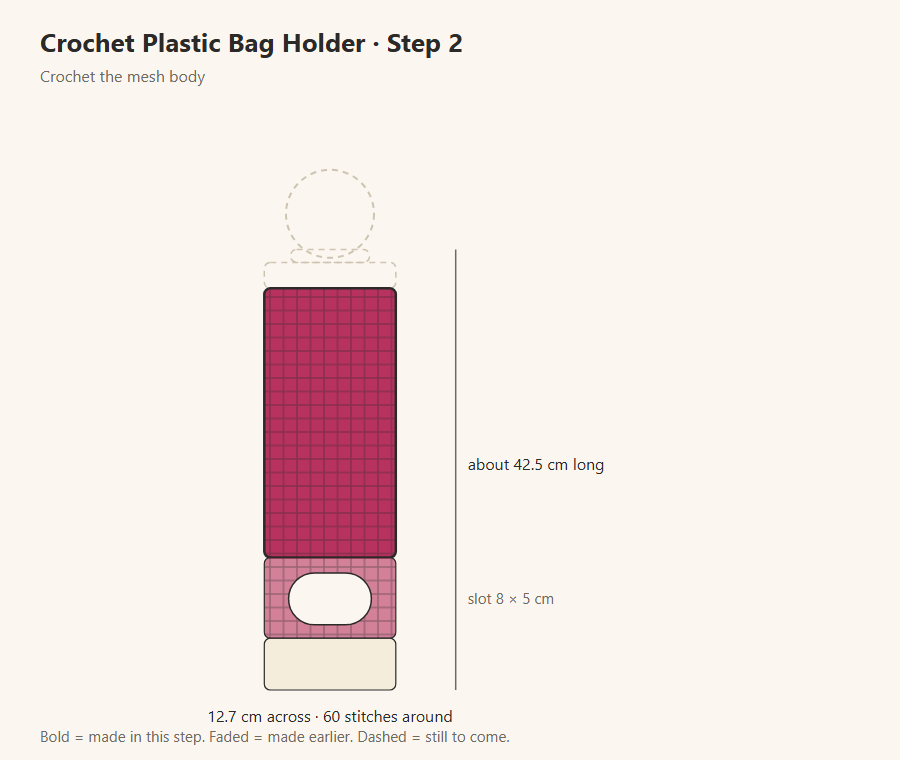
| Round | Instructions | Stitches |
|---|---|---|
| Mesh rows 7–27 | (Dc in next dc, ch 1 over the next ch-1 space) × 30. Join with a sl st after every row. | 60 (30 mesh) |
Checkpoint: After mesh row 27 the mesh is about 33.8 cm deep, the whole piece is about 38.8 cm tall, and every round has 60 stitches (30 mesh).
Step 3: Upper rim and hanging ring
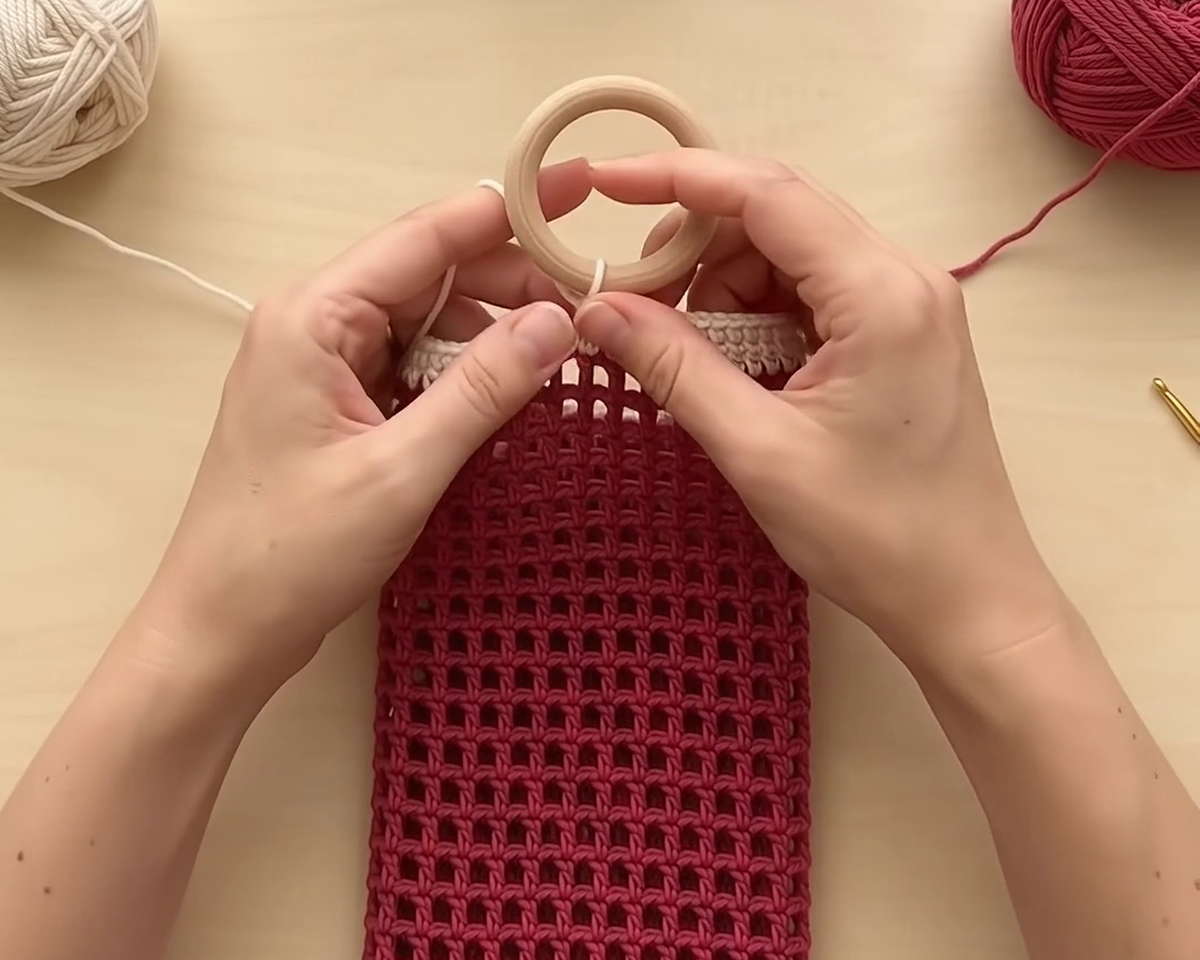
Work four rounds of single crochet into every double crochet and chain space for the cream rim. The collar narrows to half the stitches so it hugs the ring. Press it flat, lay the ring’s lower edge against it and fold it down. Sew the last round to the base through both layers so the ring cannot slip out.
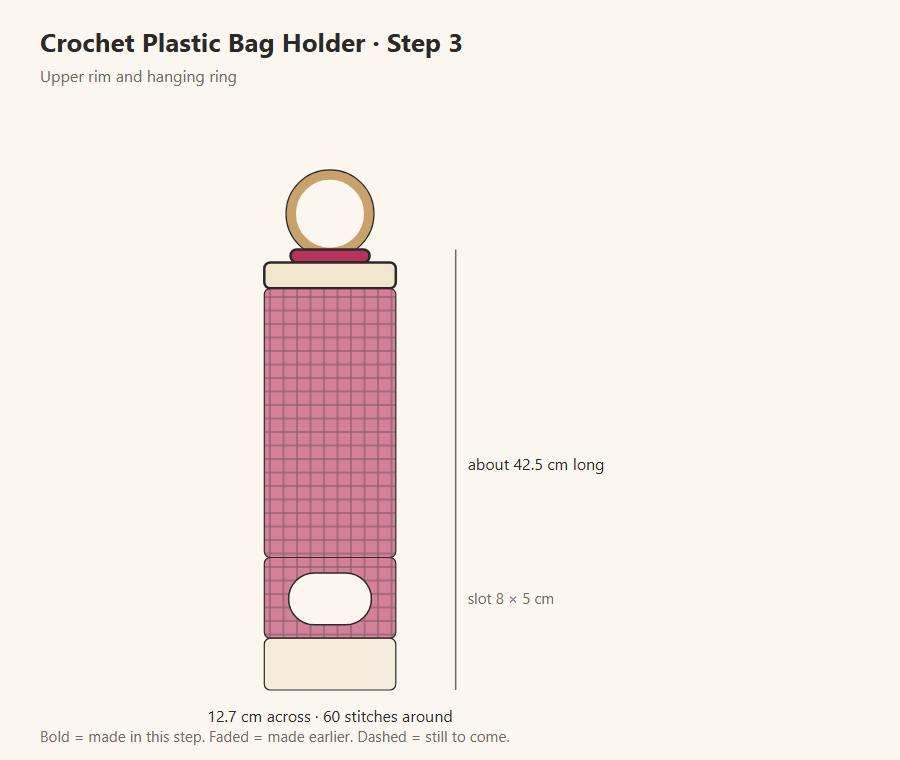
| Round | Instructions | Stitches |
|---|---|---|
| Rim rnds 1–4 | Change to cream. Rnd 1: sc in each dc and in each ch-1 space around. Rnds 2–4: sc in each st around. | 60 |
| Collar rnd 1 | Change to the body colour. Dec around. | 30 |
| Collar rnds 2–4 | Sc in each st around. Fasten off. | 30 |
| Ring | Flatten the collar (15 st on each side, about 10 cm wide). Slide the lower arc of the 8.5 cm wooden ring against it, fold the collar down over the ring and whipstitch the last round to the base of the collar. | — |
Checkpoint: 4 cream rim rounds of 60 stitches, then a collar of 30 stitches that flattens to about 10 cm, wide enough to fold over the 8.5 cm wooden ring. The finished holder is about 42.5 cm long.
Step 4: Crochet the flowers
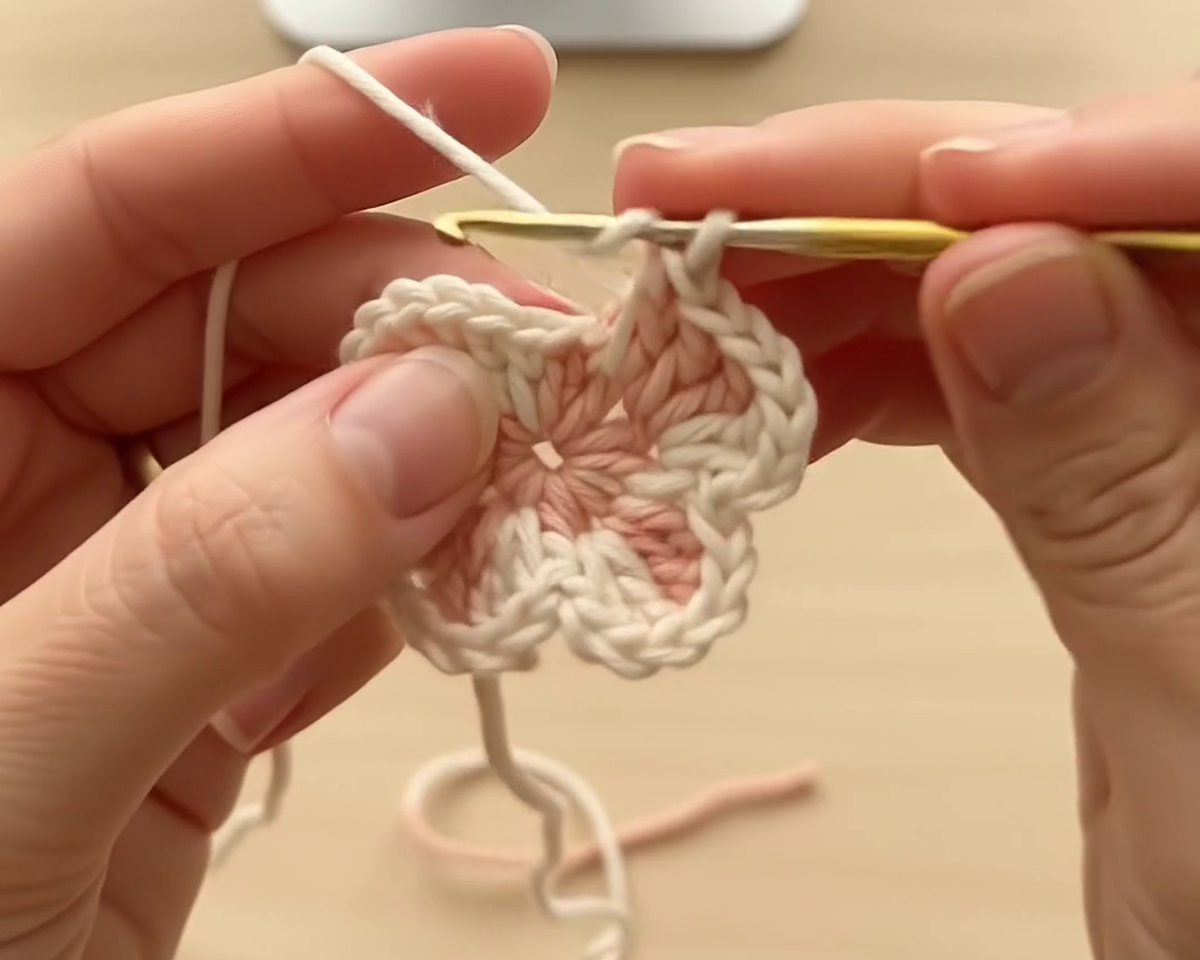
Five petals grow from a tiny magic ring, each a group of double crochets in one stitch. Work three flowers, dropping one hook size each time so they step down in size. For each of the four leaves, chain a short foundation and work back along it with stitches of changing height. Leave a tail on every piece.
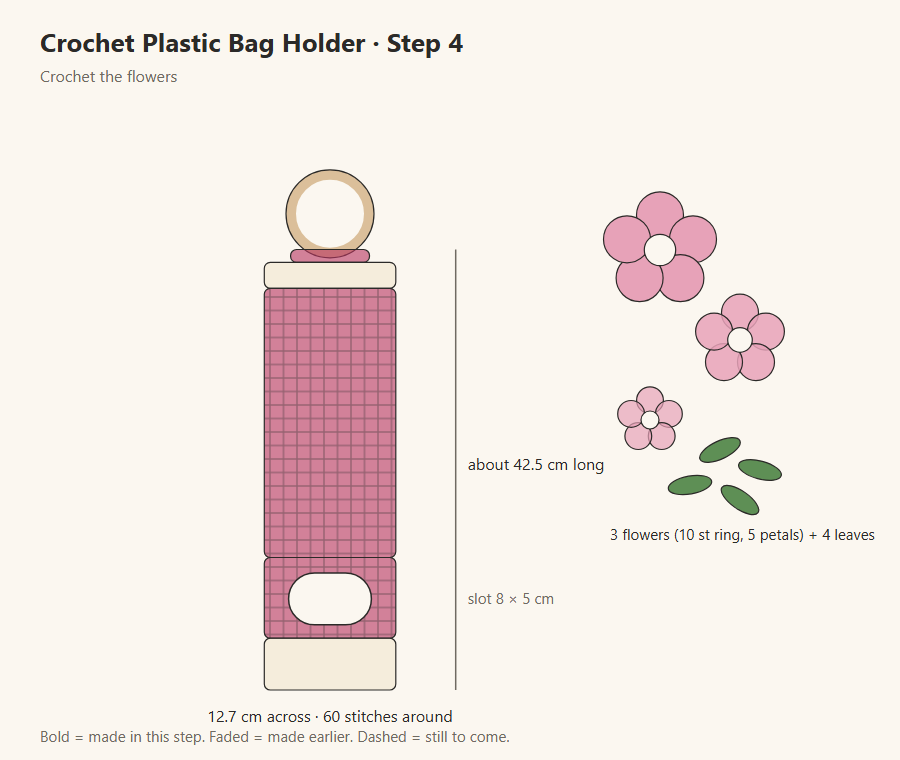
| Round | Instructions | Stitches |
|---|---|---|
| Flower rnd 1 | 10 sc in a magic ring. | 10 |
| Flower rnd 2 | (Sc in next st, 5 dc in next st) × 5. Sl st to join and fasten off, leaving a tail for sewing. | 5 petals |
| Leaf (make 4) | Ch 7. Starting in the 2nd ch from the hook: sl st, sc, hdc, dc, hdc, sc. Fasten off, leaving a tail. | 6 |
Checkpoint: 3 five-petal flowers (10 stitches in the ring, 30 in the petal round) and 4 leaves of 6 stitches. Work each flower with a hook one size smaller than the last so the three stack.
Step 5: Floral assembly
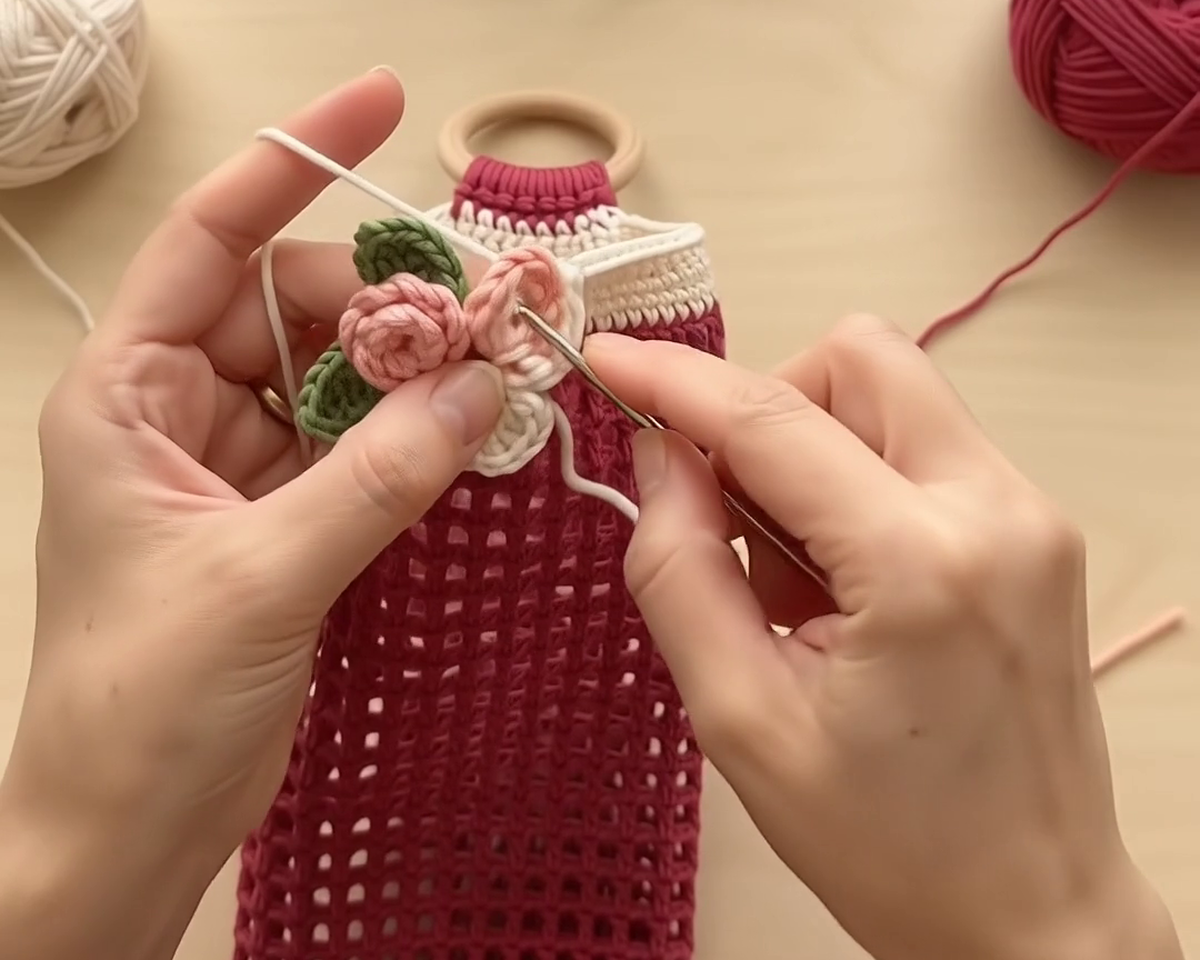
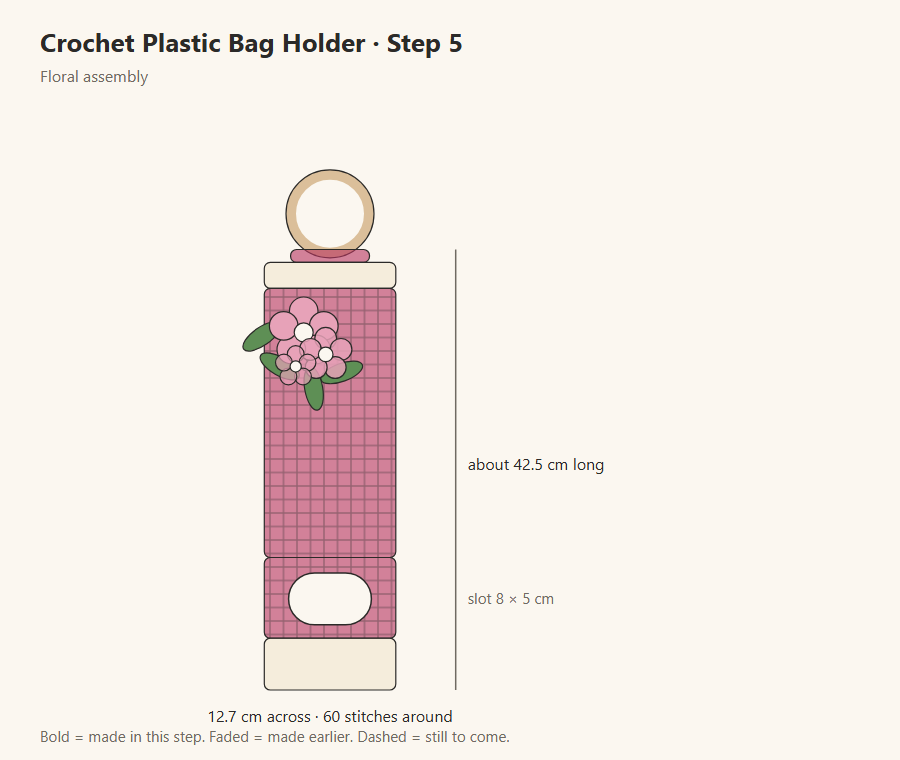
Stack the flowers with the biggest at the back and sew through the middle. Pin the cluster to the upper left, just beneath the rim, fan the leaves around it and stitch it down with the tails. Weave in the other ends, hang the dispenser and pull a bag out to check the slot.
| Round | Instructions | Stitches |
|---|---|---|
| Assembly | Stack the 3 flowers (largest at the bottom) and sew them through the centre. Sew the cluster and the 4 leaves to the upper left of the body, just below the rim. | — |
Checkpoint: The 3 flowers are stacked, largest at the bottom, and sewn with the 4 leaves to the upper left of the body, just below the rim.
Mistakes to watch for
- Uneven mesh: wobbly holes mean uneven tension. Practise a few rows and unpick any that are too tight.
- Off-centre slot: mark the middle of the front before the first turned row and count the 12 skipped stitches twice.
- A flaring rim: every rim round should have 60 stitches. More makes it ruffle, fewer pulls it in.
- A collar that will not fold: check that the decrease round left 30 stitches. Flat, the collar is 10 cm wide for an 8.5 cm ring.
Longer, wider or another colour
- Longer: each extra mesh row adds 1.25 cm. Add rows after the slot is closed.
- Wider: each extra base round adds 6 stitches around (3 mesh) and about 1.3 cm of width.
- Colour: swap raspberry for any shade that stands out against your cabinets and keep the cream cup and rim.
The video shows the slot being formed and a bag being pulled out.