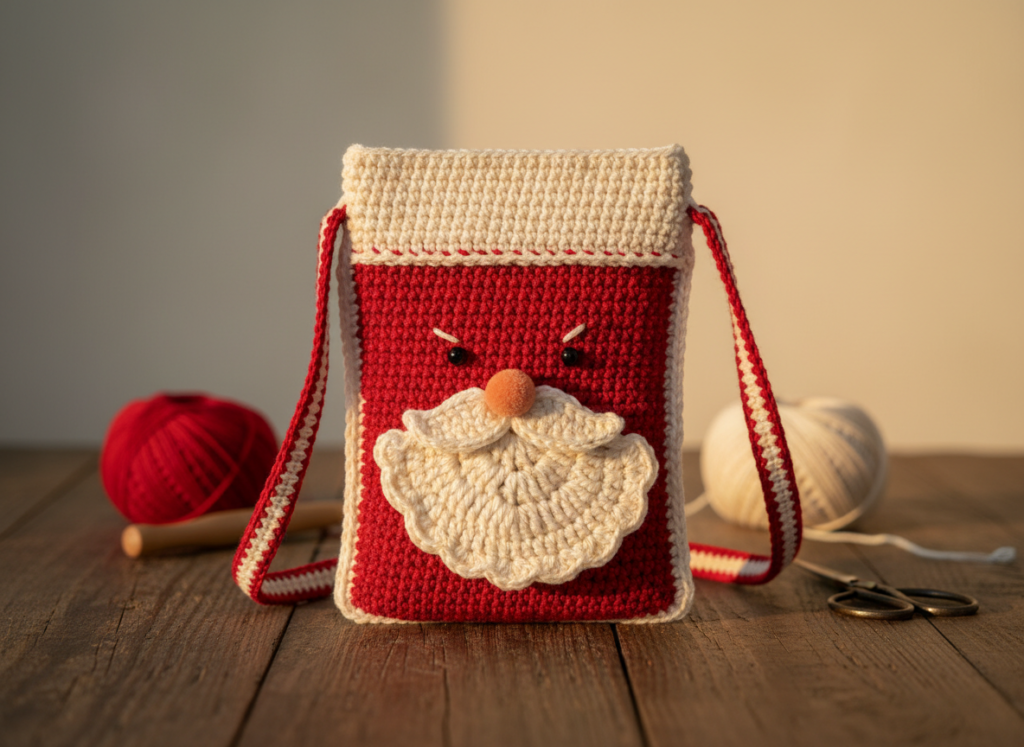
Embrace the holiday spirit with this delightful Jolly Santa Crossbody Bag, a project that’s as fun to make as it is charming to wear! Perfect for holding small treasures during festive outings or as a unique handmade gift, this bag combines classic Christmas cheer with practical design. Its sturdy cotton construction and whimsical Santa face will bring smiles wherever you go, making it a standout accessory for the season.
Pattern Essentials
- Skill Level: Beginner-Friendly
- Finished Size: Approximately 12 cm (4.7 in) wide x 17.5 cm (6.9 in) tall
- Gauge: 18 sc x 20 rows = 10 cm (4 inches) in single crochet
- Abbreviations Used: ch (chain), sc (single crochet), sl st (slip stitch), FO (fasten off)
Materials
- Worsted Weight (Category 4) Cotton Yarn:
- Red: Approximately 80 yards
- Cream: Approximately 40 yards
- Peach: Small amount for nose (approx. 5 yards)
- Hook: 4.5-5.5 mm (US 7 to I/9), or the size that gives you the gauge above
- Yarn Needle
- Small black beads (2) for eyes
- Scissors
- Stitch markers (optional)
Step-by-Step Overview
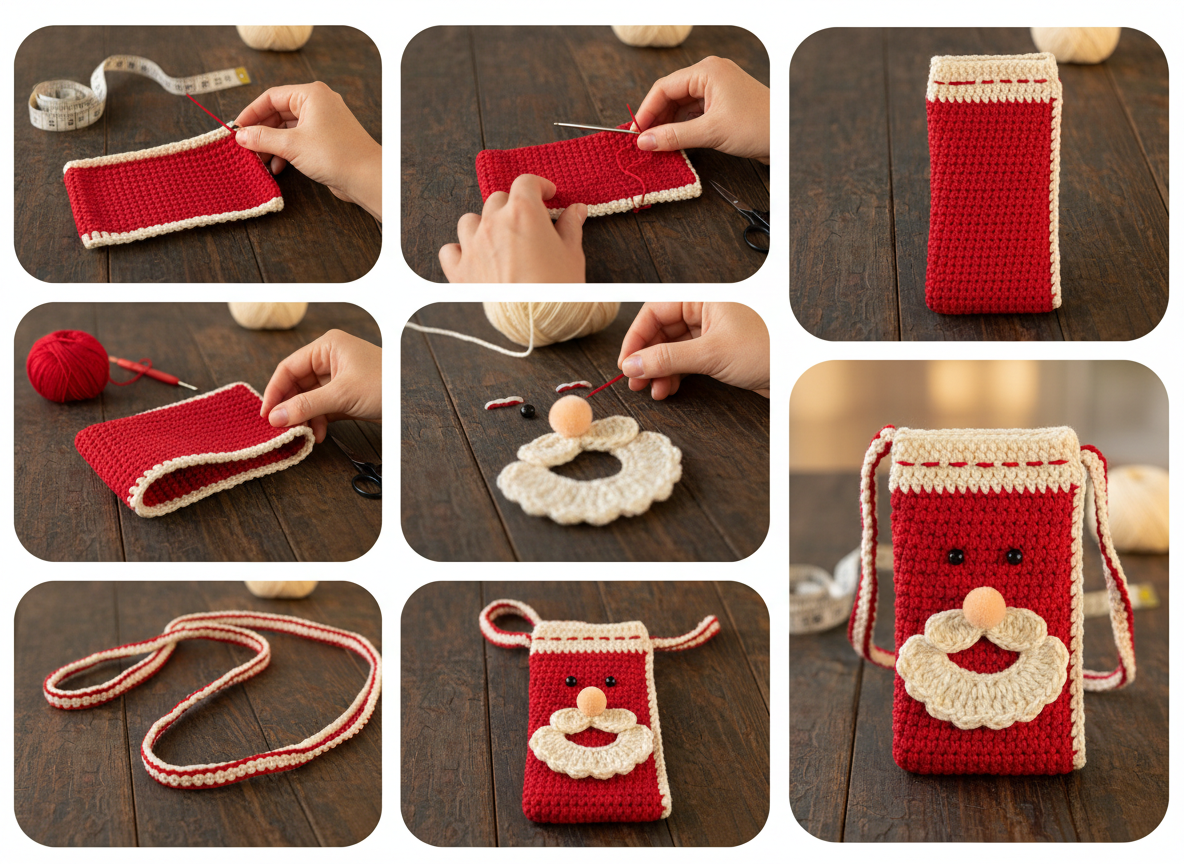
Stage 1 — Craft the Primary Rectangle
Begin by creating the foundational piece of your Santa bag. You’ll start with a chain, then work in single crochet stitches to form the cream-colored band at the top, which should measure about 3.5 cm in height. Next, switch to the festive red yarn and continue crocheting in single crochet to complete the larger body of the rectangle, maintaining consistent tension throughout to avoid uneven edges. This crucial first stage will conclude at Row 28, containing 34 stitches.
Stage 2 — Construct the Pouch Body
Once your main rectangle is complete, it’s time to transform it into the bag’s body. Fold the piece precisely in half, ensuring the cream band aligns perfectly at the top edge. Using a yarn needle and matching yarn, carefully whip stitch the raw edges of the right side and bottom together, leaving the top open for the bag’s opening. This creates the basic pouch shape with two whip-stitched seams.
Stage 3 — Apply Decorative Edging
To give your Santa bag a polished look, attach cream yarn to one of the newly formed whip-stitched seams. You’ll then work a narrow, uniform scalloped edging along both the side and bottom seams. This not only adds a lovely decorative touch but also neatly covers the seam stitches, ensuring your two scalloped edges are finished along the bag seams.
Stage 4 — Assemble Santa’s Features
Now for the fun part: bringing Santa’s face to life! Carefully sew two small black beads onto the front panel to create the eyes. Next, embroider cream stitches above the eyes to form endearing eyebrows. Craft a soft peach pom-pom for the nose and securely stitch it in place. Finally, crochet a whimsical scalloped cream beard with a curled moustache and attach it just below the nose, ensuring all facial features (eyes, eyebrows, nose, beard, moustache) are firmly secured.
Stage 5 — Attach the Carry Strap
Complete your Jolly Santa Crossbody Bag by crocheting a flat, striped strap, approximately 115 cm in length, using alternating red and cream yarn. Once the strap is finished, securely attach each end to the top corners of the bag’s opening. Be sure to reinforce these attachment points for durability, making the bag ready for wear with its striped strap attached.
Flat bag rectangle (24 x 17.5 cm): Pattern Chart
Every stitch count below is calculated from the gauge and checked round by round, so each round works into exactly the stitches the round before it made. Gauge used: 14 stitches and 16 rows per 10 cm (4 in) in single crochet. A different gauge changes the finished size, so work a small swatch first.
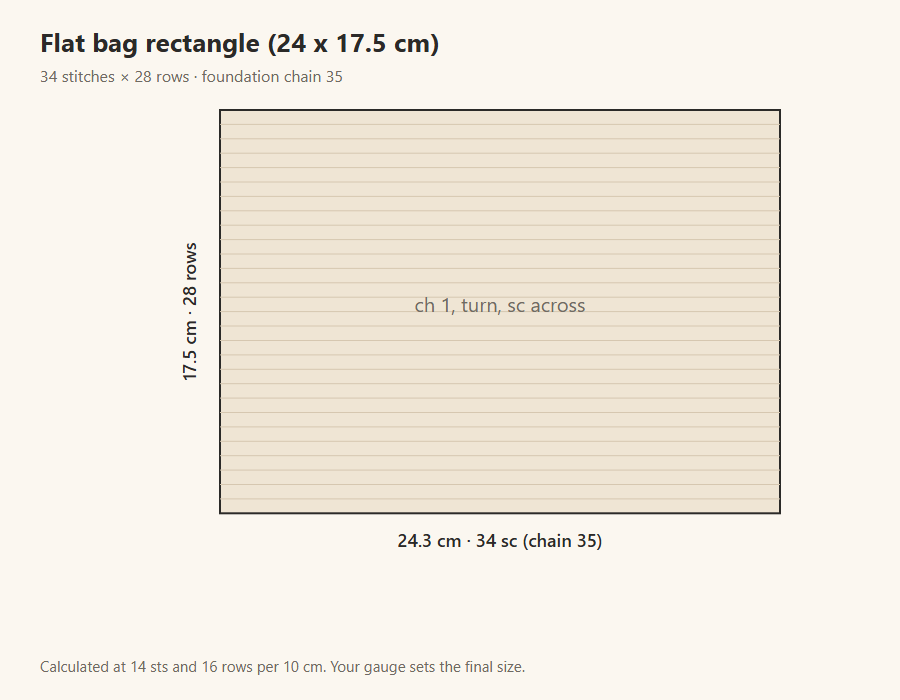
| Round | Instructions | Stitches |
|---|---|---|
| Foundation + Row 1 | ch 35. Sc in the 2nd ch from hook and in each ch across. | 34 |
| Row 2 | ch 1, turn, sc in each st across. | 34 |
| Row 3 | ch 1, turn, sc in each st across. | 34 |
| Row 4 | ch 1, turn, sc in each st across. | 34 |
| Row 5 | ch 1, turn, sc in each st across. | 34 |
| Row 6 | ch 1, turn, sc in each st across. | 34 |
| Row 7 | ch 1, turn, sc in each st across. | 34 |
| Row 8 | ch 1, turn, sc in each st across. | 34 |
| Row 9 | ch 1, turn, sc in each st across. | 34 |
| Row 10 | ch 1, turn, sc in each st across. | 34 |
| Row 11 | ch 1, turn, sc in each st across. | 34 |
| Row 12 | ch 1, turn, sc in each st across. | 34 |
| Row 13 | ch 1, turn, sc in each st across. | 34 |
| Row 14 | ch 1, turn, sc in each st across. | 34 |
| Row 15 | ch 1, turn, sc in each st across. | 34 |
| Row 16 | ch 1, turn, sc in each st across. | 34 |
| Row 17 | ch 1, turn, sc in each st across. | 34 |
| Row 18 | ch 1, turn, sc in each st across. | 34 |
| Row 19 | ch 1, turn, sc in each st across. | 34 |
| Row 20 | ch 1, turn, sc in each st across. | 34 |
| Row 21 | ch 1, turn, sc in each st across. | 34 |
| Row 22 | ch 1, turn, sc in each st across. | 34 |
| Row 23 | ch 1, turn, sc in each st across. | 34 |
| Row 24 | ch 1, turn, sc in each st across. | 34 |
| Row 25 | ch 1, turn, sc in each st across. | 34 |
| Row 26 | ch 1, turn, sc in each st across. | 34 |
| Row 27 | ch 1, turn, sc in each st across. | 34 |
| Row 28 | ch 1, turn, sc in each st across. | 34 |
Yarn needed (estimate): about 65 yards (59 m) for this part. This is a rough estimate, so buy a little extra.
- The turning chain does not count as a stitch.
Helpful Crochet Tips
- When switching colors, carry the unused yarn loosely along the back of your work, catching it every few stitches to prevent long floats and ensure a neat finish.
- For the facial features, use strong sewing thread or dental floss to attach the beads and pom-pom securely, as these areas will experience more wear.
- To achieve perfectly curled moustache ends, lightly dampen the finished curls and gently shape them around a small object (like a pencil) before letting them air dry completely.
- Practice your whip stitch on a scrap piece of yarn first to ensure your seams are tight and even, creating a clean foundation for the scalloped edging.
And there you have it – your very own Jolly Santa Crossbody Bag, ready to accompany you on all your festive adventures! This project is truly a celebration of handmade charm, combining simple techniques with an irresistibly cute design. Imagine pairing it with a cozy holiday sweater, or gifting it to a loved one who adores unique, handcrafted accessories.
Feeling creative? Consider adding a small jingle bell to Santa’s hat (if you choose to add one) or embroidering a tiny star on the back for an extra touch of personalization. This pattern is wonderfully versatile, allowing you to infuse your own style into every stitch. The joy of crochet lies not just in the finished product, but in the mindful process of creation, and this Santa bag offers plenty of both.
Once your Santa bag is complete, we’d absolutely love to see it! Share your finished creation on social media using #JollySantaBag and tag us – let’s spread some handmade holiday cheer together!