Charming Chef Gnome Crochet Curtain Tie-Backs: A Delightful Kitchen Accent
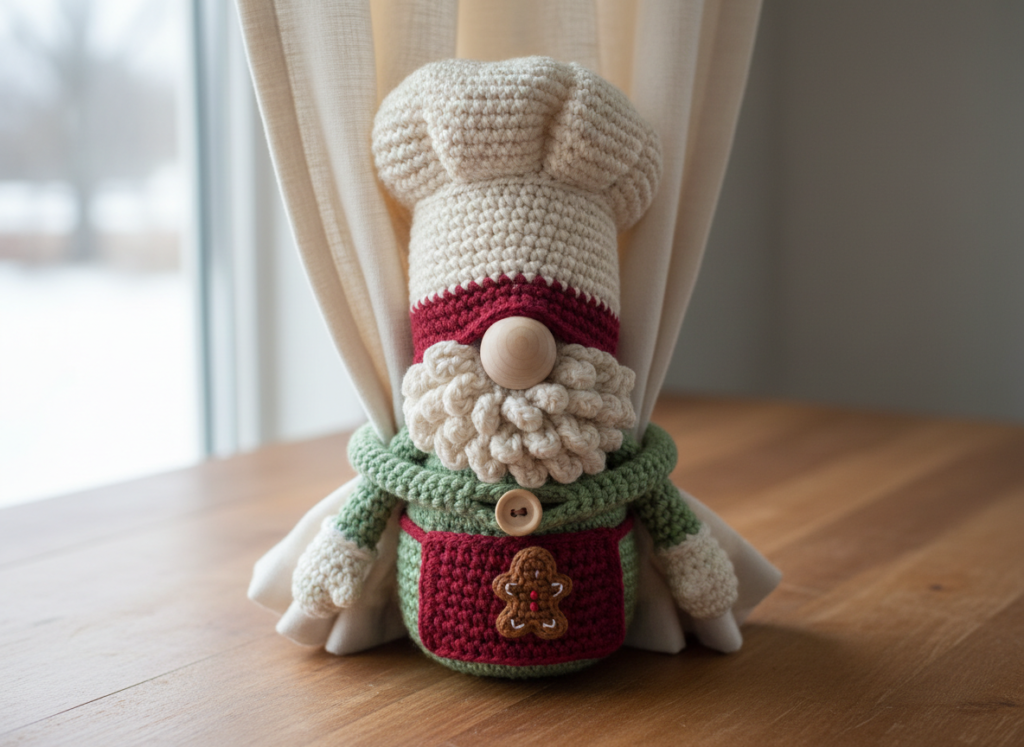
Welcome to a project that will sprinkle a dash of whimsical charm and coziness into your kitchen! Today, we’re diving into creating these absolutely adorable Chef Gnome Crochet Curtain Tie-Backs. Imagine these little culinary guardians, with their tall chef hats, fluffy curly beards, and tiny gingerbread cookie aprons, lovingly hugging your kitchen curtains. Not only do they add a unique, handmade touch to your home decor, but they also serve a practical purpose, keeping your curtains neatly tied back with their clever button and loop closure. These gnomes are perfect for adding a festive touch during the holiday season, or simply as an everyday charming accent that brings a smile to your face. They make incredible housewarming gifts, or a special present for anyone who loves to cook and appreciates a touch of handmade artistry. When finished, these gnomes feel wonderfully soft yet sturdy, with delightful textural contrasts from the smooth stitches of their hats and aprons to the playful loop stitches of their beards and the classic single crochet of their arms. Their compact size makes them versatile, fitting perfectly into any kitchen aesthetic, from farmhouse chic to modern minimalist, adding a warm, inviting feel that machine-made items simply can’t replicate. Get ready to crochet some joy!
Pattern Info
- Skill Level: Easy
- Finished Size: Approximately 7 inches tall (from hat tip to bottom of apron) with arms extending to about 10 inches each, perfect for gathering standard curtain widths.
- Gauge: 4 sc and 4 rows = 1 inch (using worsted weight yarn and 4.0mm hook, measured from the apron piece).
- Abbreviations Used:
- sc = single crochet
- inc = increase (2 single crochet in one stitch)
- ch = chain
- sl st = slip stitch
- rnd = round
- st(s) = stitch(es)
- loop st = loop stitch
Materials
- Yarn: Worsted weight (Category 4) acrylic yarn in the following colors and approximate yardages:
- Ivory: Approximately 50 yards (for hats, beards, and mittens)
- Cranberry: Approximately 25 yards (for hat bands and aprons)
- Sage: Approximately 30 yards (for arms)
- Cocoa: Approximately 5 yards (for gingerbread cookies)
- Cream: A small amount for cookie embroidery (optional)
- Crochet Hook: 4.0mm (G-6)
- Notions:
- Two 15-20mm wooden beads (for noses)
- Two small wooden buttons (approx. 0.5 inch diameter)
- Yarn needle for weaving in ends and assembly
- Stitch markers (optional, but helpful for rounds)
- Scissors
Pattern Overview
These charming chef gnome curtain tie-backs are constructed in several distinct pieces that are then assembled to bring our little kitchen helpers to life. You’ll begin by crocheting the main body parts: the tall, three-lobed chef hat in ivory, complete with a cranberry band, and the delightful curly loop-stitch beard, also in ivory. Next, you’ll create the cranberry apron, which gets its own special touch with a tiny cocoa gingerbread cookie appliqué. The gnome’s functional arms, made in sage yarn, are then crocheted as long straps, each ending with two cozy ivory mittens. Once all the individual components are ready, the assembly process begins by securely joining the hat, beard, and wooden bead nose to form the gnome’s head. The apron, with its little cookie, is then sewn to the bottom of this head assembly. Finally, the long arm straps, adorned with their mittens, are attached to the sides of the gnome. A small wooden button is sewn onto one arm, and a corresponding loop is created on the other, allowing your gnomes to securely embrace your curtains. This modular approach makes the project manageable and fun, building up details layer by layer to create a truly unique and functional piece of decor.
Step-by-Step Instructions
Let’s grab our hooks and yarn, and embark on the delightful journey of bringing these chef gnomes to life, one stitch at a time. Follow along with the detailed instructions below, and don’t hesitate to refer to the accompanying video for visual guidance!
Step 1: Crochet the Chef Hat and Beard
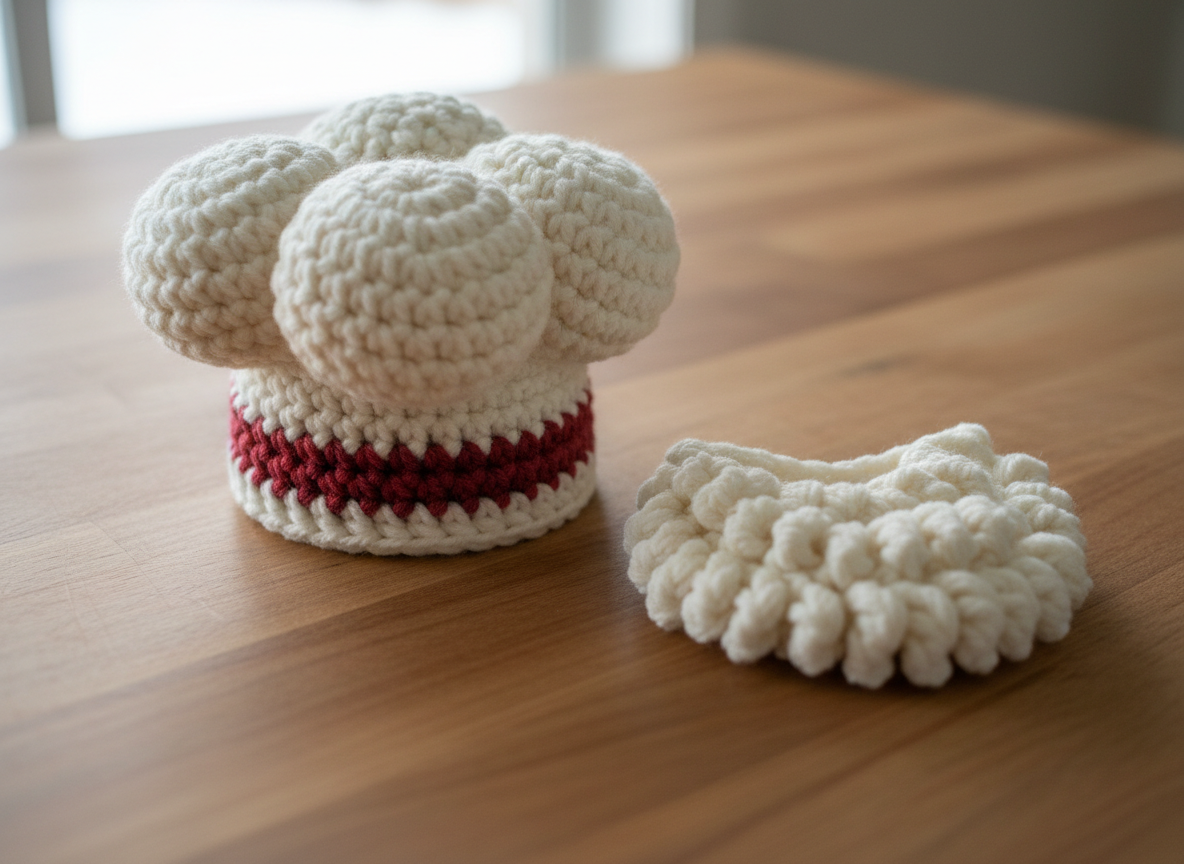
Using ivory yarn, create the chef hat.
Round 1: Start with a magic ring, 6 sc into ring. (6 sts)
Round 2: Inc in each st around. (12 sts)
Round 3: (Sc in next st, inc in next st) around. (18 sts)
Round 4-6: Sc in each st around. (18 sts)
Round 7: (Sc in next 2 sts, inc in next st) around. (24 sts)
Round 8-10: Sc in each st around. (24 sts)
Round 11: (Sc in next 3 sts, inc in next st) around. (30 sts)
Round 12-14: Sc in each st around. (30 sts)
Sl st to join and fasten off.
For the cranberry band, join cranberry yarn to the base of the hat.
Round 1: Ch 1, sc in each st around. (30 sts)
Sl st to join and fasten off. Weave in ends.
For the beard, using ivory yarn:
Ch 16.
Row 1: Starting in 2nd ch from hook, (sc in next st, loop st in next st) 7 times, sc in last st. (15 sts)
Row 2: Ch 1, turn. Sc in each st, making sure to work into the top of the loop stitches. (15 sts)
Repeat Row 1 and 2 until the beard reaches desired fullness (approximately 5-6 rows). Fasten off, leaving a long tail for sewing.
Step 2: Crochet the Apron and Gingerbread Cookie Applique
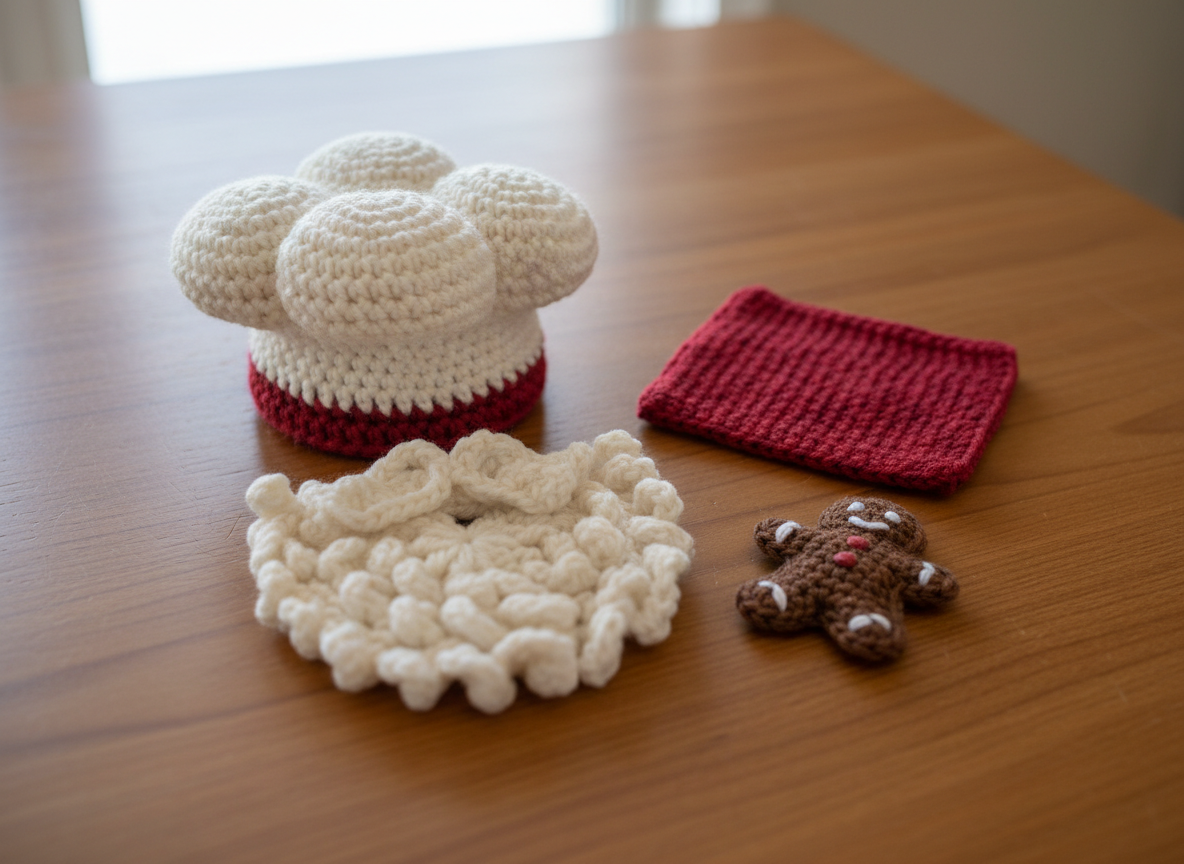
For the apron, using cranberry yarn:
Ch 10.
Row 1: Starting in 2nd ch from hook, sc in each ch across. (9 sts)
Row 2-5: Ch 1, turn. Sc in each st across. (9 sts)
Fasten off, leaving a long tail for sewing. Weave in other ends.
For the gingerbread cookie, using cocoa yarn:
Round 1: Start with a magic ring, 6 sc into ring. (6 sts)
Round 2: Inc in each st around. (12 sts)
Round 3: (Sc in next st, inc in next st) around. (18 sts)
Sl st to join and fasten off, leaving a long tail for sewing. Using cream yarn, embroider small dots or lines for decoration if desired.
Step 3: Crochet the Arms and Mittens
Using sage yarn, make two arm straps.
Ch 35.
Row 1: Starting in 2nd ch from hook, sc in each ch across. (34 sts)
Fasten off, leaving a long tail for sewing.
For the mittens, using ivory yarn, make four:
Round 1: Start with a magic ring, 6 sc into ring. (6 sts)
Round 2: Inc in each st around. (12 sts)
Round 3-5: Sc in each st around. (12 sts)
Sl st to join and fasten off, leaving a long tail for sewing.
Step 4: Assemble the Gnome Body and Attach Apron and Cookie
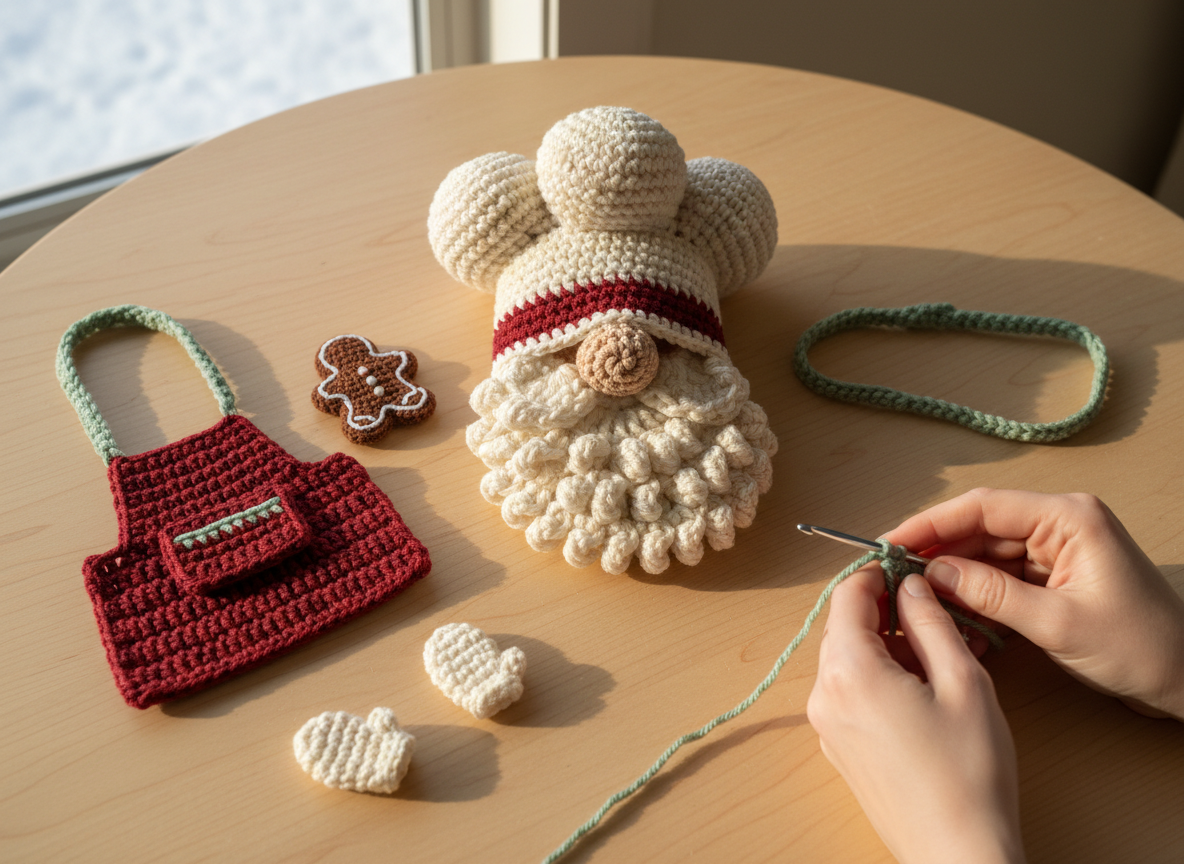
Take the hat, beard, and a wooden bead for the nose. Position the beard below the hat, and the bead as the nose, then sew them securely together using the tails. This forms the head assembly.
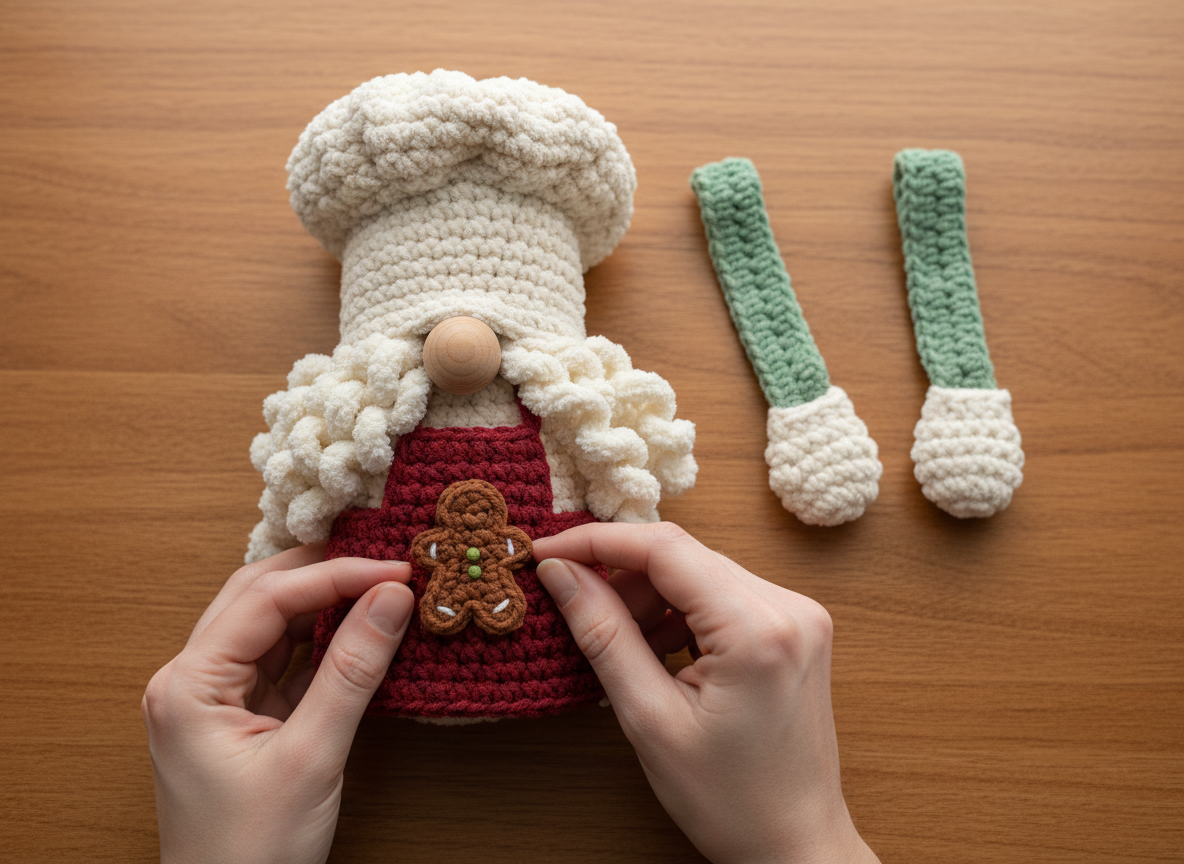
Sew the apron to the bottom edge of the head assembly, centered. Then, using the tail from the gingerbread cookie, sew it onto the center of the apron. Securely attach two ivory mittens to each end of the two sage arm straps.
Step 5: Attach Arms and Final Assembly
Attach the two completed arm straps (with mittens) to each side of the gnome body, just below the beard, ensuring they are evenly spaced. On one arm, sew a small wooden button near the end. On the other arm, create a small loop using a chain stitch or by sewing a small piece of yarn, positioned to fit over the button for closure. Weave in all remaining loose ends.
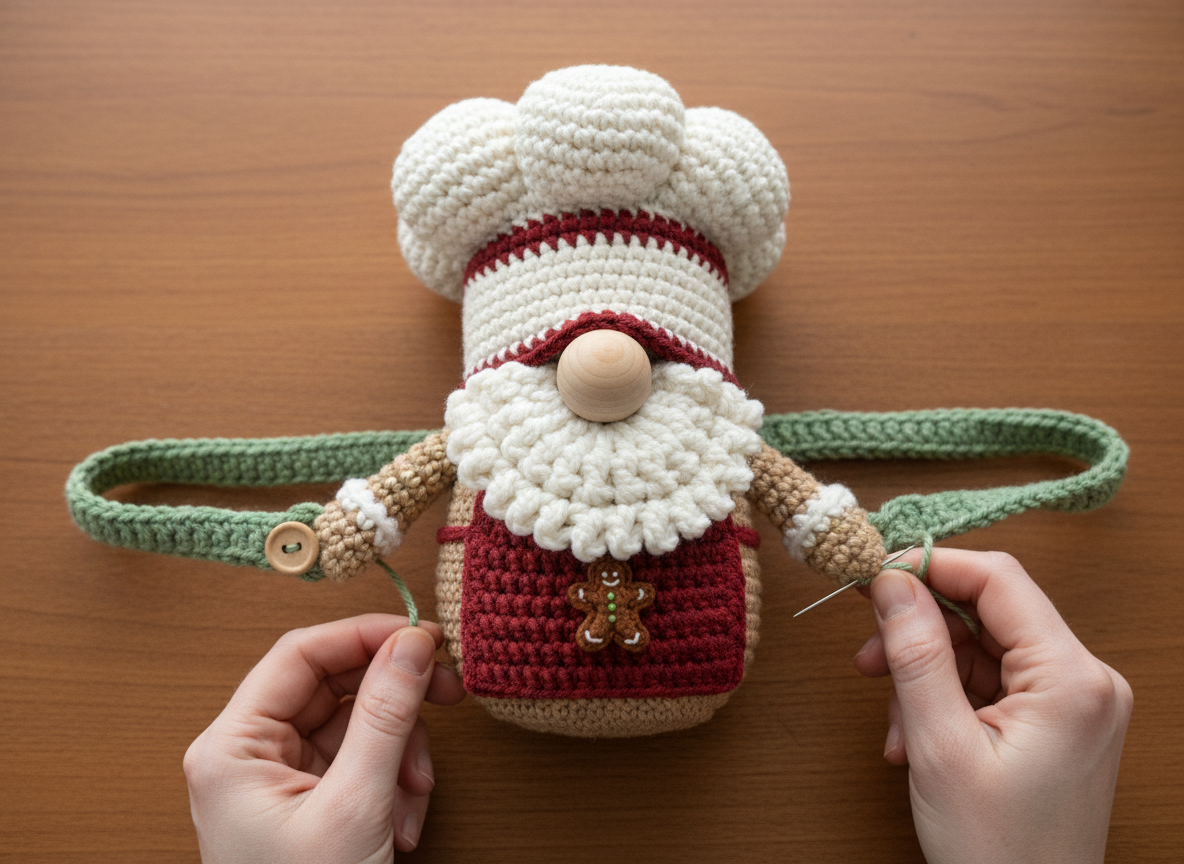
And there you have it – your very own pair of charming Chef Gnome Crochet Curtain Tie-Backs! Aren’t they just the sweetest addition to your kitchen? I love how their little personalities shine through, from the jaunty angle of their chef hats to the playful texture of their curly beards. The tiny gingerbread cookie on their aprons is just the icing on the cake, adding that extra touch of warmth and whimsy that makes handmade items so special. Once you’ve fastened them around your curtains, step back and admire how they instantly transform the feel of your kitchen, adding a cozy, inviting atmosphere that’s perfect for baking, cooking, or simply enjoying a cup of coffee.
These gnomes aren’t just for curtains, either! While they excel at keeping your kitchen drapes neatly tied, you could also adapt this pattern to create individual gnome ornaments for your Christmas tree, or even scale them up slightly to make shelf sitters for a festive display. Imagine a whole little brigade of chef gnomes overseeing your holiday baking! For a subtle variation, you could experiment with different colors for the apron or hat band – perhaps a festive green or a rich navy to match your kitchen’s existing palette. The gingerbread cookie appliqué could also be swapped out for a tiny crocheted heart or star for a different theme. Don’t be afraid to make these gnomes truly your own!
I truly hope you enjoyed crocheting these delightful little chefs. If you found any part of the process tricky or just want to see each stitch in action, be sure to watch the companion video for a full visual walkthrough. It’s a fantastic resource to guide you through every step, ensuring your gnomes turn out perfectly. Once your chef gnomes are proudly displayed, I would absolutely love to see them! Please share photos of your finished curtain tie-backs on social media and tag me. It brings me so much joy to see your creations and how you bring these patterns to life in your own unique spaces. Happy crocheting, and enjoy your adorable new kitchen companions!