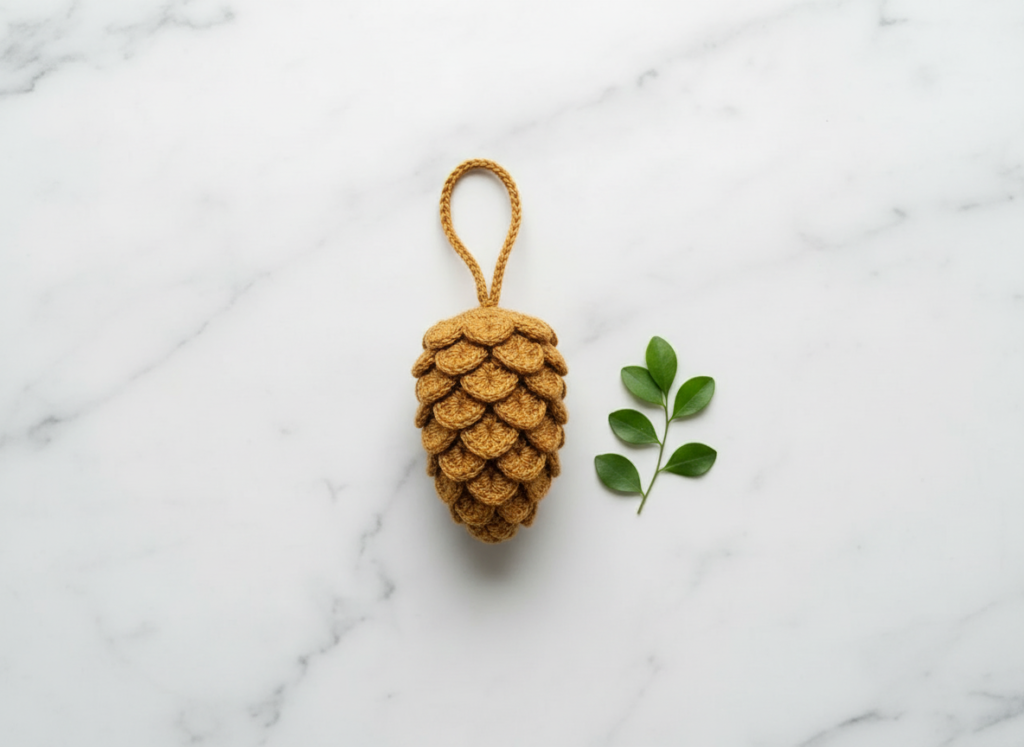
Discover how to craft a truly special holiday decoration with this textured crochet pinecone ornament! This project will guide you in creating a beautiful, realistic pinecone from golden-brown cotton yarn, perfect for adding a touch of rustic elegance to your Christmas tree or gifting to loved ones. The unique construction, combining a firm base with individually crocheted scales, results in a wonderfully tactile and visually appealing ornament that captures the charm of nature.
Pattern Info
- Skill Level: Easy (suitable for advanced beginners comfortable with basic stitches and working in the round)
- Finished Size: Approximately 9 cm (3.5 in) tall and 5.5 cm (2.2 in) wide, with a 5 cm (2 in) hanging loop.
- Gauge: Not critical for this project, but consistent tension is important for a neat finish.
- Abbreviations Used: MR (Magic Ring), ch (chain), sc (single crochet), hdc (half double crochet), sl st (slip stitch), st(s) (stitch/stitches), FO (Fasten Off).
Materials
- Yarn: Worsted weight (Category 4) 100% cotton yarn, approximately 50-60 yards in golden-brown.
- Crochet Hook: 3.5 mm (E-4)
- Notions: Tapestry needle, scissors, polyester fiberfill stuffing, stitch markers (optional).
Step-by-Step Overview
Stage 1 — Crafting the Base Shape
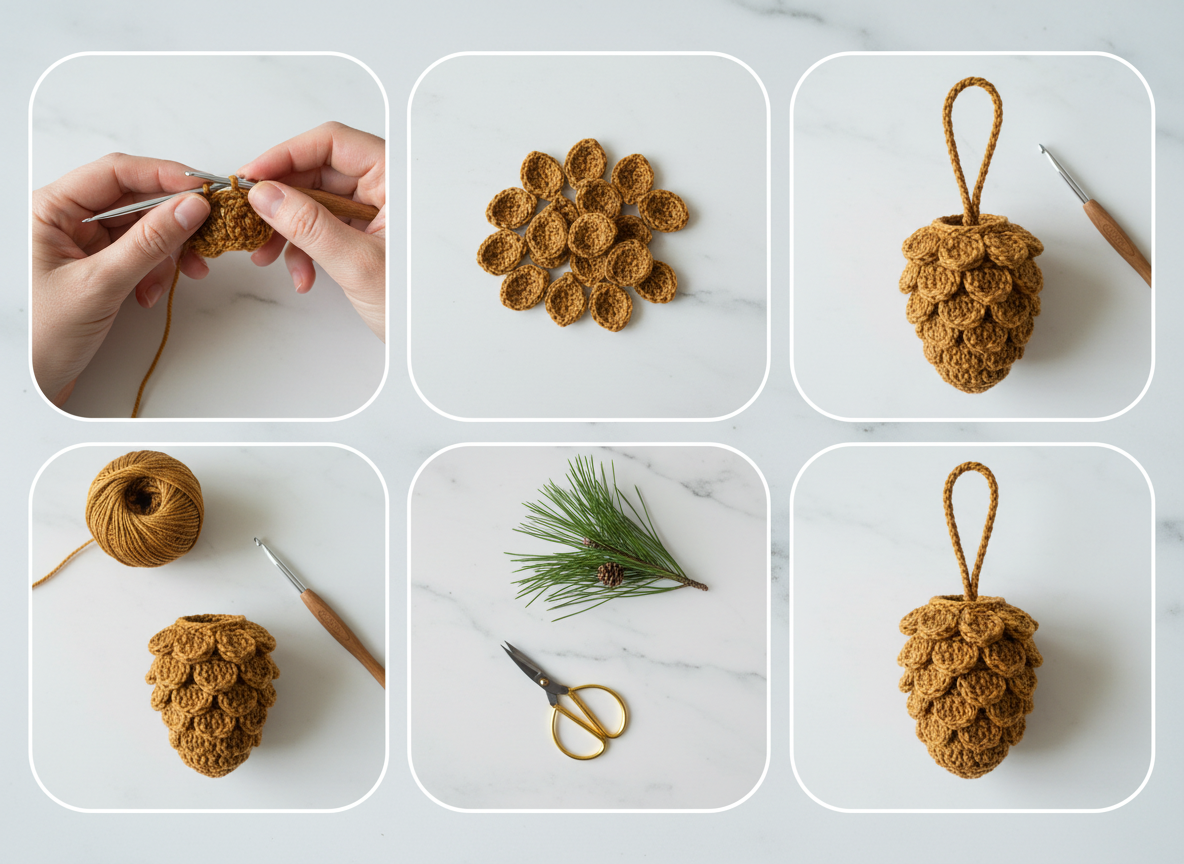
Begin by creating the foundational core of your pinecone. This elongated, tapered cone is crocheted in continuous single crochet rounds, starting with a magic ring at the narrow bottom tip. You’ll gradually increase stitches to expand the base, then work straight rounds to build height, aiming for consistent, firm tension to ensure the stuffing won’t show through. The finished core should be about 7 cm tall with a maximum circumference of approximately 11 cm.
Stage 2 — Producing the Individual Scales
Next, you’ll crochet the distinct, small oval-shaped scales that give the pinecone its signature texture. These are worked flat in rows, typically using a combination of single crochet and half double crochet stitches to create a plump, textured oval form. Focus on uniformity in size and shape, as you’ll need around 30-35 identical oval scales before moving on.
Stage 3 — Beginning Scale Attachment
With your core and scales ready, it’s time to start assembling the pinecone! Using a yarn needle, secure the first layer of scales around the broadest section of the core. Overlap each scale slightly to achieve a natural, layered appearance, ensuring even spacing for a balanced look. This initial row should consist of about 10-12 scales.
Stage 4 — Developing the Pinecone Form
Continue attaching additional rows of scales, working your way upwards along the core. Each new row must overlap the one below it, with scales staggered to mimic the organic spiraling pattern of natural pinecones. As you progress, incrementally fill the core with polyester stuffing, shaping it to maintain the teardrop form and desired firmness. The pinecone should be fully covered with scales up to the compact rounded top, before the final row.
Stage 5 — Final Details and Hanging Element
To complete your pinecone, neatly secure the top of the core with a few last scales. Then, craft a sturdy braided hanging loop from three strands of the golden-brown yarn, ensuring it measures about 10 cm before braiding. Attach this loop securely to the very peak of the pinecone, making sure it can support the ornament’s weight. The completed ornament will measure approximately 9 cm tall, including the 5 cm hanging loop.
Helpful Crochet Tips
- Stuffing Technique: For a smooth, even shape, add small amounts of polyester fiberfill gradually as you work up the core and add scales. Use the blunt end of your crochet hook to push stuffing into tight spots.
- Consistent Scale Size: The uniformity of your scales is key to a realistic pinecone. If your scales vary too much, block them lightly to encourage a consistent shape before attaching.
- Invisible Scale Attachment: When sewing scales, use small, neat stitches in matching yarn color, hidden under the edges of the scales, to make the attachment virtually invisible.
- Braiding for Strength: Ensure your braided hanging loop is tight and even. A loosely braided loop can stretch or unravel, compromising the ornament’s security on the tree.
And there you have it – a beautifully textured crochet pinecone ornament, ready to adorn your holiday decor! The process of building this piece, from the solid core to the overlapping scales, is incredibly satisfying, and the end result is a truly unique item you’ll cherish for years. Imagine a cluster of these hanging from your Christmas tree, their golden-brown hues catching the twinkling lights, or perhaps tied to a special gift for a handmade touch.
This ornament isn’t just for the tree; consider using it as a charming accent in a holiday centerpiece, or strung together with other natural elements to create a rustic garland. The cotton yarn gives it a lovely, earthy feel, making it versatile for various decorating styles. Feel free to experiment with different shades of brown or even add a touch of sparkle with a metallic yarn if you’re feeling adventurous!
Once you’ve completed your own Textured Crochet Pinecone, don’t keep it to yourself! Share your finished creations with us on social media. We love seeing how your unique touches bring these patterns to life.